There’s nothing I like sewing for children more than knit garments; I came have some techniques to share with you so you can enjoy sewing with knits too.
Knit fabrics can be intimidating in the beginning, because we often don’t understand how to handle stretch, or feel we must have expensive specialty equipment (such as a serger, or at least a sewing machine walking foot). I assure you however that with the right kind of knit and a little practice, you’ll love to sew with this forgiving and comfortable fabric!
There are many, many types of knits (jersey, rib, stretch French terry, interlock) made from varying fibers (cotton, bamboo rayon, soy, hemp, wool and blends of these) so the selection of knits is the first important decision you can make to ensure your success. For a beginning project, you cannot go wrong with Organic Cotton Interlock like these Birch solids. Interlock is a relatively stable knit, and this one washes up beautifully.
The next important detail is to choose the correct needle. For knits, you will need to use ballpoint or jersey needles. These push fibers aside, rather than piercing them.
Thirdly, I suggest you reduce the presser foot pressure on your machine. The less intensely the foot presses, the less likely you are to overly stretch the fabric while sewing.
Finally, choose a stretch stitch. My favorite is a zig-zag set at 3.0 Long and 1.5 Wide. Most machines also include a “lightning stitch” which is a stretch straight stitch. I don’t advise using this one unless you are 100% certain you won’t be required to do any seam ripping, as this one’s a bear to undo.
Standard Neckline
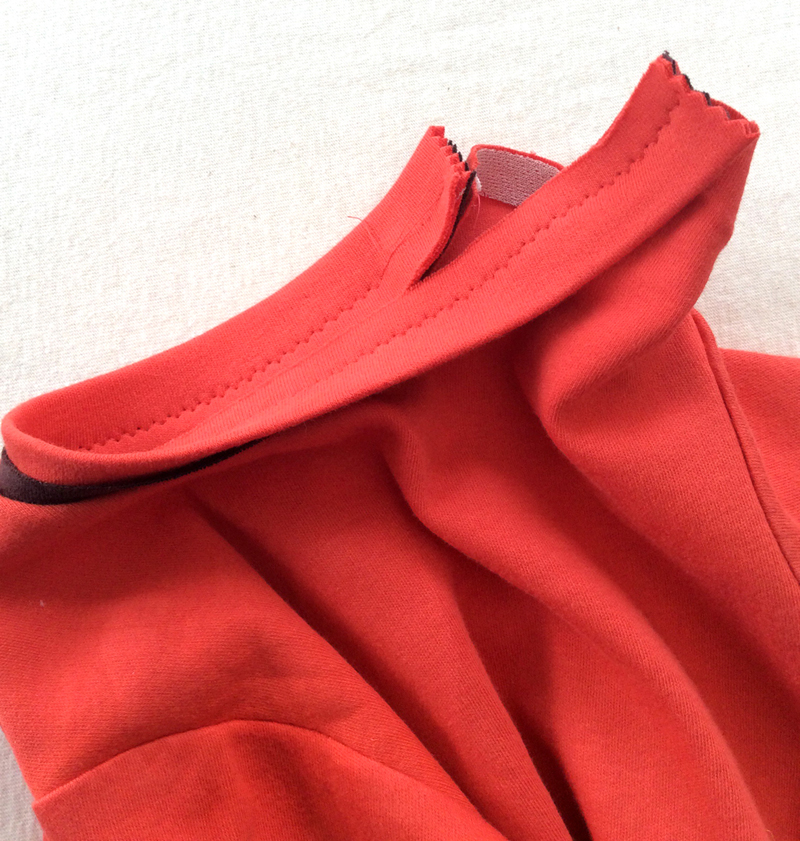
When attaching a neckline, I always measure the neckline on the shirt and then subtract 1-2” from the neckband fabric before cutting on the crossgrain (the direction with the most stretch). It’s helpful to try sliding this over your child’s head to test for sizing. Adjust as necessary.

Fold the neckband in half, lengthwise and gently press. Clip or pin the neckband at the halfway point, then at each opening for a shirt with a fastening placket. (For a full-circle neckband, sew ends together before pressing. Pin at each shoulder, center front and center back.)
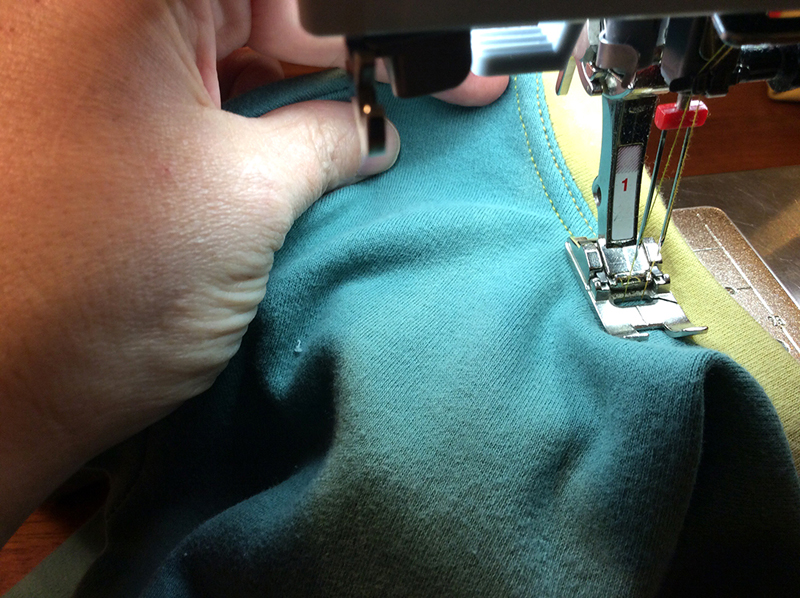
Stitch, using the stretch stitch of your choice, while gently stretching the neckband sections even with the shirt sections between your pins or clips.
Press the neckband up, with seam allowances toward the inside of the shirt. You may leave the shirt this way, or top stitch in place.
Double-Needle Top Stitch
If you have access to a double needle for your machine, you will definitely want to give this finish a try! It looks like two parallel lines of stitching on the right side, with a zigzag for stretch on the wrong side.
Best sure to stitch on top of the seam allowances to hold down the seams. (Added bonus: It’s also more comfortable for the kid!) Stitch slowly, and use a longer stitch length, because you will be stitching through four layers of knit. Try not to pull as you stitch, letting the feed dogs do their job.
Backstitch to end. Press with steam when you’re finished.
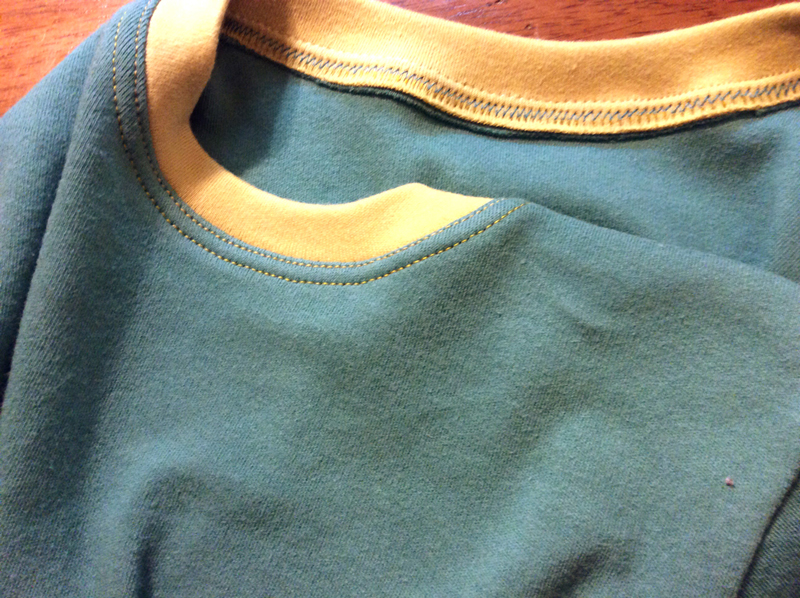
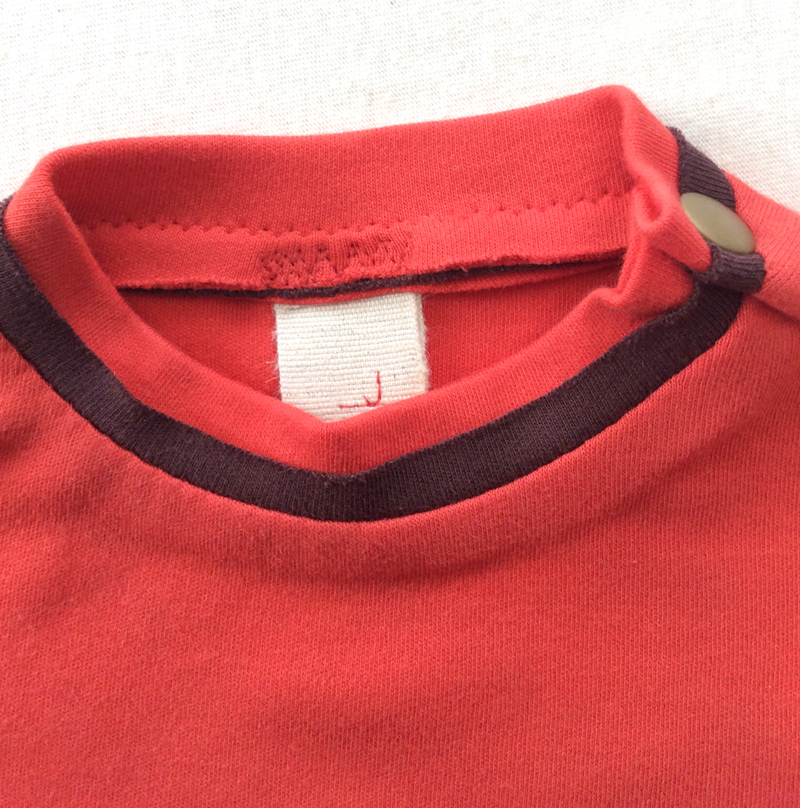
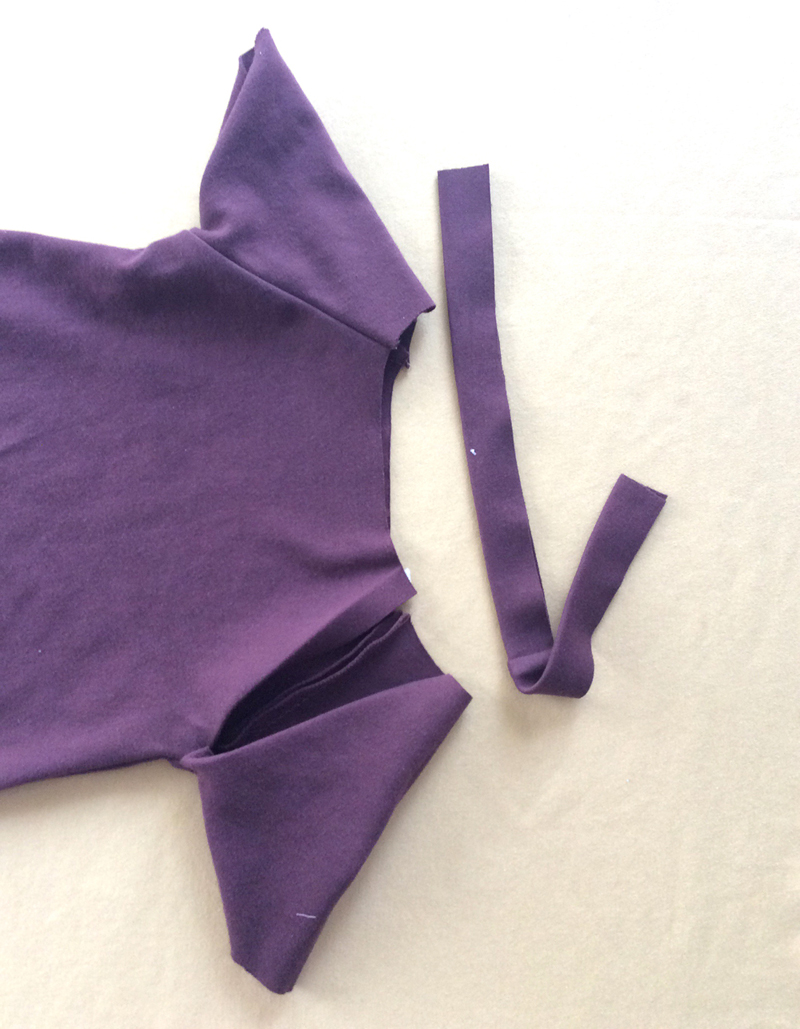
Accent Fabric/Double Neckband with Zigzag Finish
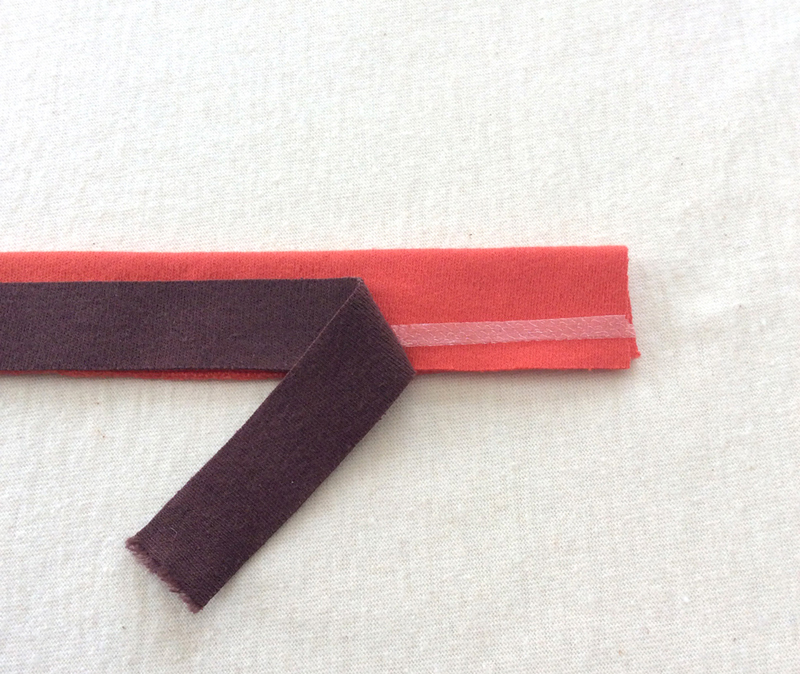
If you save your knit scraps, you will have a lot of options with this one! Double-sided washaway basting tape (such as Wondertape) makes this easier, but isn’t necessary.
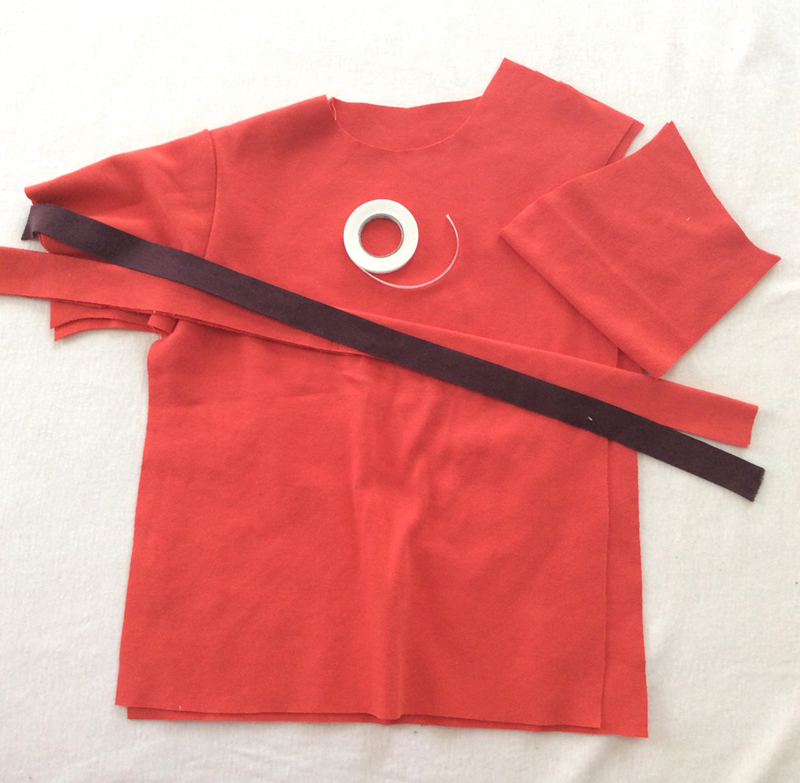
In addition to the neckline, cut a single-layer of contrast knit the same length, but shorter than half the width of the pressed neckband. (For example, I used a 2” wide neckband, pressed in half, and a 3/4” wide single layer contrast strip.)
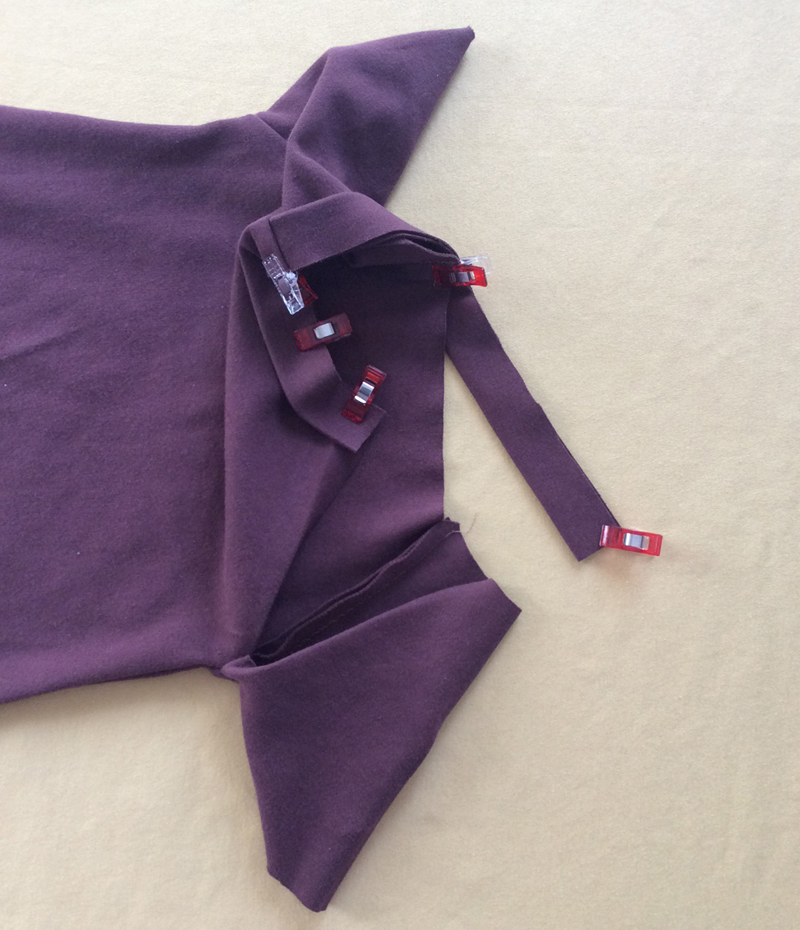
Tape (or pin) the single layer onto the folded layer of the neckline.
Continue treating the neckband as a single piece.
For this example I stitched using a 3.0 x 1.5 zigzag and a 3/8” seam allowance.
Press the neckband up as in the first example. (Optional: Press a little tag made from twill tape under the seam allowance and zigzag in place.)
Hemming:
Hemming knits can be tricky, especially since you will be stitching along the cross-grain, but you’ll still want to preserve maximum stretch at the hems. If you have a double-needle, that is always an excellent choice. These hemming options can be used on the shirt hem, and the sleeve hems as well.
Another option, and my favorite hem for knits is the three-step zigzag. To prevent stretching as you stitch, you can place tissue paper (a roll of receipt paper serves well) under the seam as you stitch, and remove after stitching, simply by pulling away the paper.
It’s possible, despite your best efforts, that your hem looks like this once you remove it from the machine:
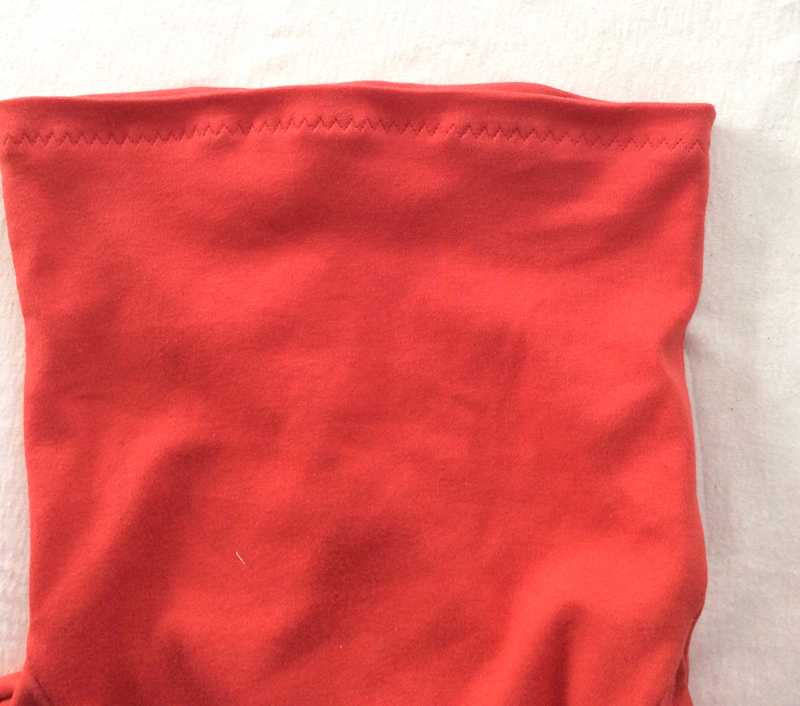
This is easily fixed with a blast of steam and light pressing.
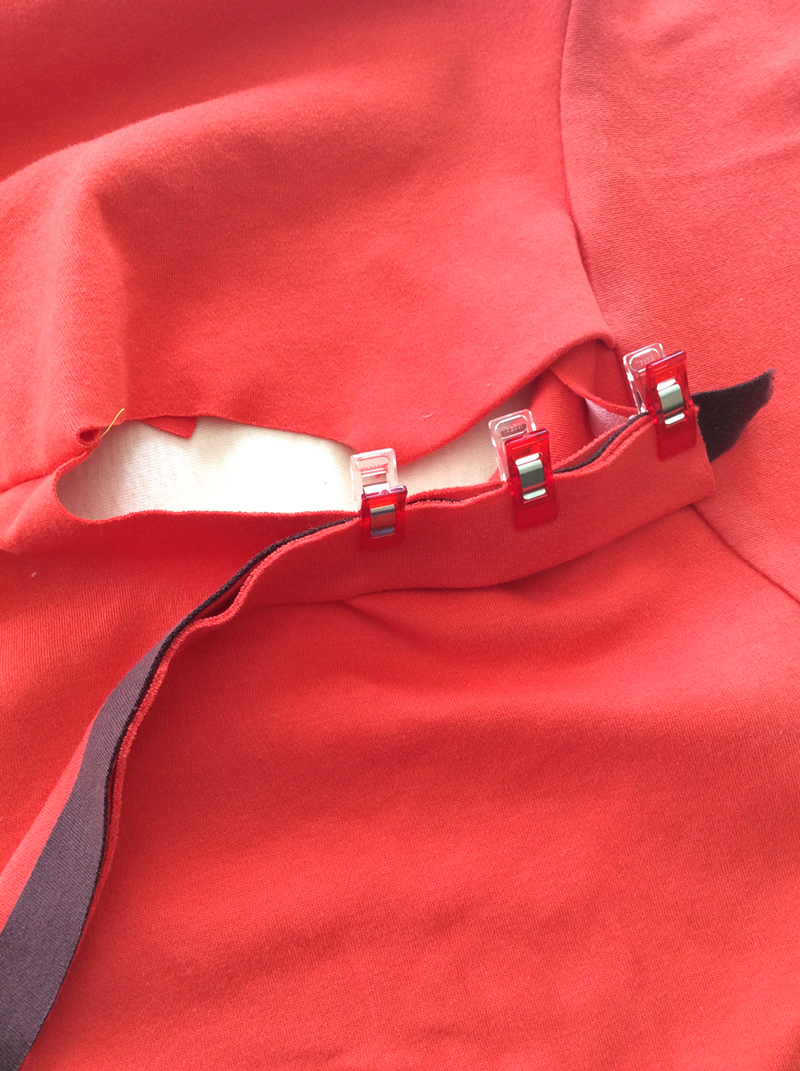
Serger Seam
If you have access to a serger (overlock machine) it can be a very fast construction method. Be sure you practice on scraps first and use a four or five-stitch safety stitch. If you have a 3-thread serger the stitch is not appropriate for construction, but can be great for finishing seam allowances after they are sewn.
Cut the and press the neckband in the same way as for sewing machine construction.
Use clips instead of pins, to prevent accidentally damaging your serger by sewing over the pins.
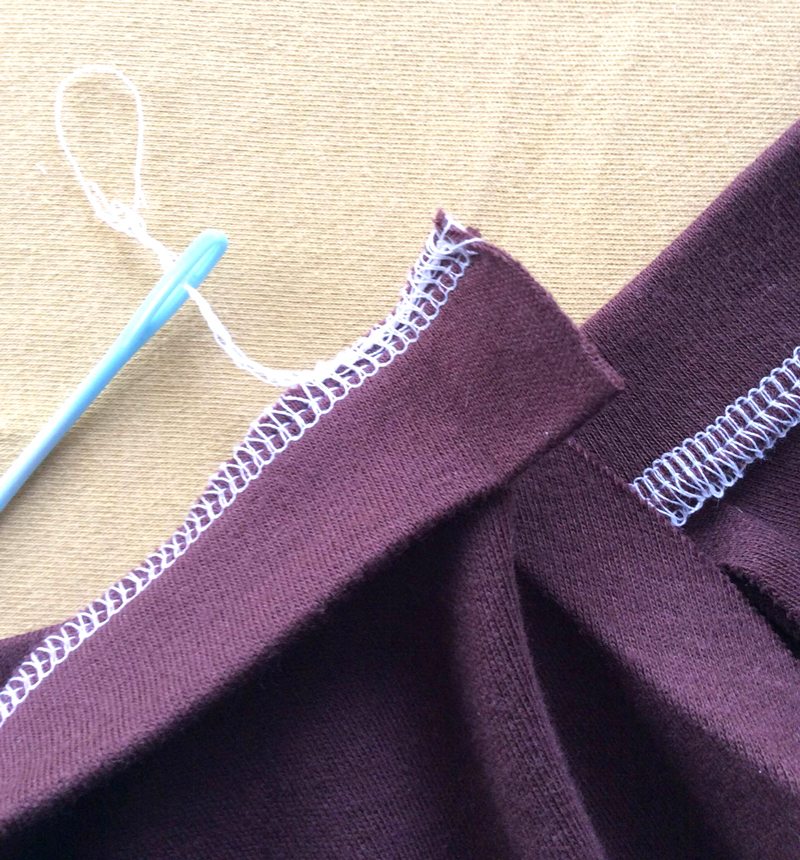
Leave a long tail at both the beginning and end of the seam. If you’re sewing in a complete circle, you will only have one long tail, but the next steps are the same. Using a tapestry needle (you may have them lying around the house for weaving in knitting ends) thread the tail back into the stitches for at least 1” then trim the excess.
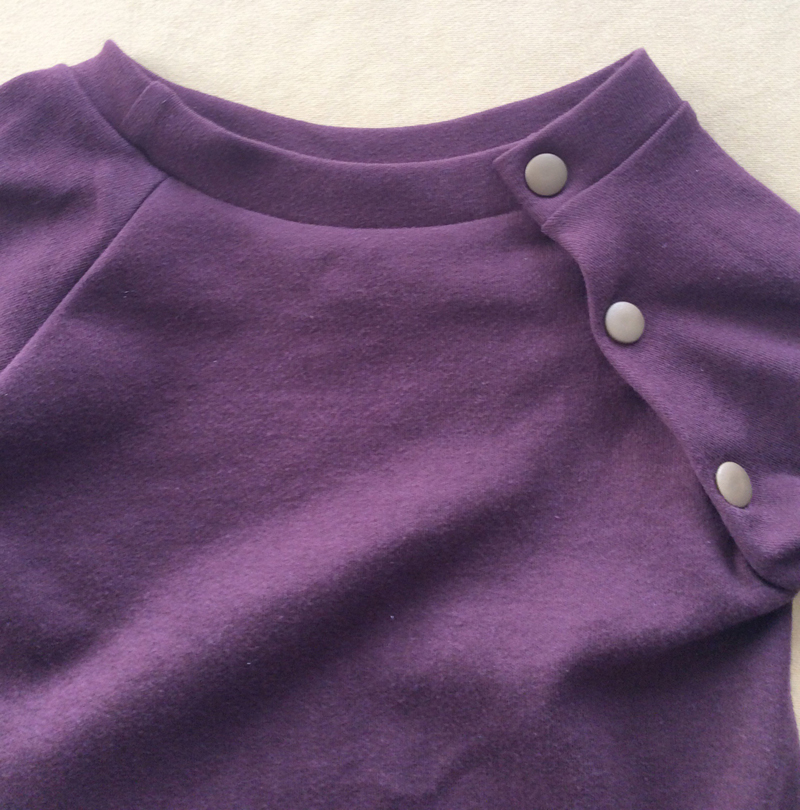
If you’re using fasteners, attach them now.
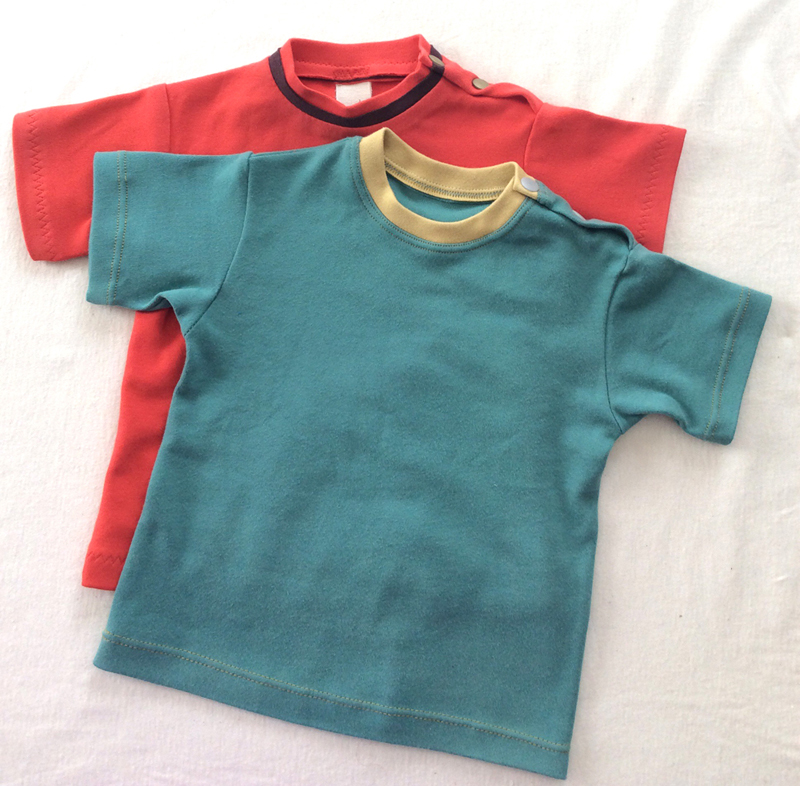
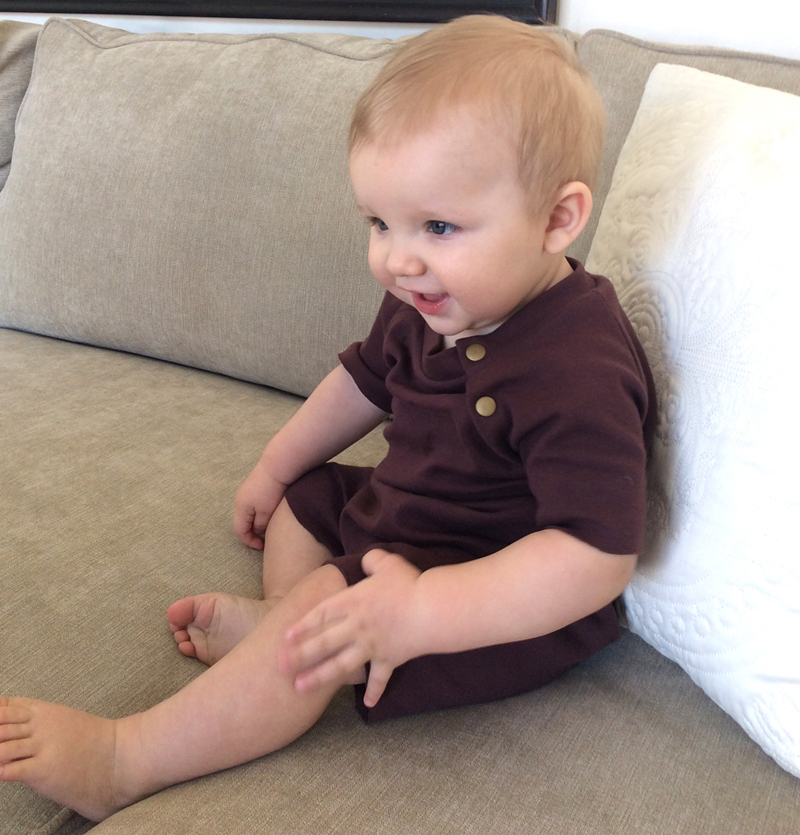
Now you can put your beautiful knit garments on your kid and admire the results of your new skills.
Once you have mastered handling interlock knits, move on to jersey and make something for yourself!