Nicole Mallalieu shares tips and tricks for a professional finish from her latest sewing book, The Better Bag Maker. Nicole’s new book focuses on bags but these tips apply to all types of sewing; her advice ranges from important info about cutting and seams, to a focus on machine features, topstitching tips and more.

People often comment on the fine finish in my sewing work. It’s something that I have striven to constantly improve upon over the last 25 years or so of working professionally within the fashion and crafts industries. This is partly because when something has my name attached to it, I don’t want it to have obvious flaws or scruffy edges. The other reason is that I’m a complete sewing geek, who gets a huge rush of excitement every time I discover a better way of doing something.
Throughout the instructions in my books and classes, I give lots of tips and tricks to teach how to achieve the level of finesse that elevates “home-made” to “hand-crafted.” Some sewing techniques take time and practice to perfect. With others, it can be a matter of a simple trick or gadget (an “ah-ha moment”) that revolutionizes the process or improves the finish. And then, there are rules of thumb… The basic underlying principles that can help everyone sew better, faster and with more confidence.
I’ve covered these principles (as well as the tips and tricks) in my new book, The Better Bag Maker. Although the book is all about bag-making, much of it can be applied to other sewing projects. Without giving too much of the book away, I’d like to share a few of the things that you can do to improve any sewing project.
1. Interfacing
Whether for a garment, hat, bag or other sewn project, use a quality interfacing, and make sure that it gives the structure that is required. If possible, find the interfacings that are recommended by the designer of any pattern that you are using. Otherwise, get to know your interfacings so that you are able to substitute.
Both my books You Sew, Girl! and The Better Bag Maker have chapters on interfacings, and include a run-down of the various types and a comparison of similar products. The Better Bag Maker focuses on bag-making interfacings and You Sew, Girl! is more general. The books are good resources, but really, the best advice I can give you is to test all the different interfacings you can find, and build up your own personal understanding of what they can do for you. Take the time to look through the range at your local store. Buy small samples of thing you don’t recognize and test them, test them, label them and use them as a resource for future interfacing decisions.
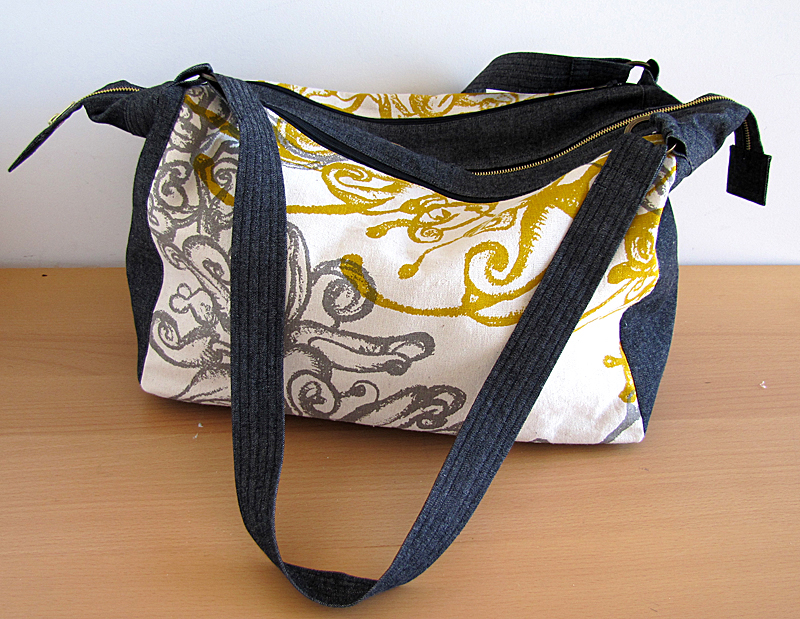
Avignon Traveler from The Better Bag Maker
2. Cutting
Don’t cut corners, so to speak, with cutting. It really is not a shortcut to be slap-dash with cutting. It’s far from it, in fact. Sloppy cutting changes the shape of the cut piece, which makes you lose sight of the required seam line. This makes it difficult to fit pieces together accurately as you sew, and that causes very “home-made” puckers in the seams as you try to fudge them together. If you cut accurately, you can keep an even seam allowance and the whole thing will come together without fuss. That saves a lot of unpicking or fudging time!
Take time to cut your paper pattern pieces out accurately, and then take care to cut the fabric as closely to the outer edge of the pattern piece as possible.
Block-fusing interfacing to the fabric before cutting is a more efficient, accurate way to cut any piece that requires interfacing. This means that you fuse a roughly-cut piece of interfacing (a bit bigger than the pattern pieces) to the uncut fabric length, and then cut out the individual pattern pieces. You can then rip off the excess interfacing from the fabric so that there is no fabric waste.
This may seem confusing at first, but since block-fusing means that you only have to cut carefully around the pattern piece once (not for each layer of fabric and interfacing), it saves cutting time. Also, all the shrinkage or distortion that can happen to fabric when it is pressed and fused happens before cutting, so once cut, the piece remains accurate and stable. This saves sewing (fudging and unpicking) time.
3. Seams
Accurate seams matter. Really. If you fail to sew along the stitching line, you are changing the shape of the pattern piece and the project won’t fit together smoothly.
It should go without saying that it’s important to stick to the designed seam allowance for each particular project that you make, and keep an even distance from the edge of the fabric. It’s also important to keep the edges of fabric aligned with each other, so that the seam allowance is even on both pieces.
I’m often surprised by how little attention some people pay to sewing accurately (even those who are experienced and confident sewing machine users) because they think that it’s easy to fudge seams together and it’ll “all come out in the wash.” This might be true on large, unstructured garments, but on smaller or more structured things, there is nowhere to hide a pucker or stretch in the fabric and all the wonky bits are on display. Very unprofessional!
To keep an even seam allowance, use whatever means you can to help you. This might be a seam guide on the sewing machine, lining the edge of the presser foot up with the cut edge of fabric, or even drawing in the seam-line on the fabric before you stitch. Whatever method you use, make a point of taking care to sew where you’re supposed to sew. Also take care to keep the edges of the fabric aligned (which is easy if the pieces are cut accurately!).
The more that you practice taking care, the better your “eye” becomes for keeping an even seam allowance, and the less conscious concentration it takes to do it. It’s worth the effort.

Basic Bag with Alternative Straps from The Better Bag Maker
4. Get to Know Your Sewing Machine
Experiment with the presser feet and functions on your sewing machine. These days there are loads of bells and whistles on sewing machines that can take a lot of the hard work out of sewing.
Many people own machines with a knee-lift lever for the presser foot, which means that they don’t have to take their hands off their work when they need to lift the presser foot, and many people don’t use this feature! I’ve never understood that. If you can control the machine without taking your hands away from the fabric you have, well… more control. It also saves time. Why do you think all industrial sewing machines have knee or foot-controlled presser feet? If you have a knee lift on your machine, try getting used to using it, and then you’ll understand what I mean.
Edgestitching Foot
There are presser feet that help you to sew over thick lumps and bumps in fabric, feet that help you stitch an even row of topstitching or edgestitching or ditch-stitching, walking feet, roller feet and zipper feet of various design and many others. There is the ability to change needle position or foot pressure on some machines, and the ability to set needle-up or needle-down (or presser foot up or down) every time you stop. There are myriad gadgets and gizmos. I outline a few of them in my books, but it’s best to get to know them on your particular machine.
These and all other features and gadgets need to be explored and understood, so that when sewing isn’t going well on a particular part of a particular project, you know what to try that might make it better (“Perhaps if I try increasing the foot pressure… Or maybe use my ¼ inch foot…?”). You’ll know the right tool for the job, and an alternative in case that doesn’t work… And possibly even a “Plan C.” You’ll get the most out of your machine and produce better work.
6. Topstitching Tips
Topstitching can serve decorative, structural or constructional purposes. Whatever the purpose, it’s always visible, and getting it right can make the difference between professional and amateur finishing.
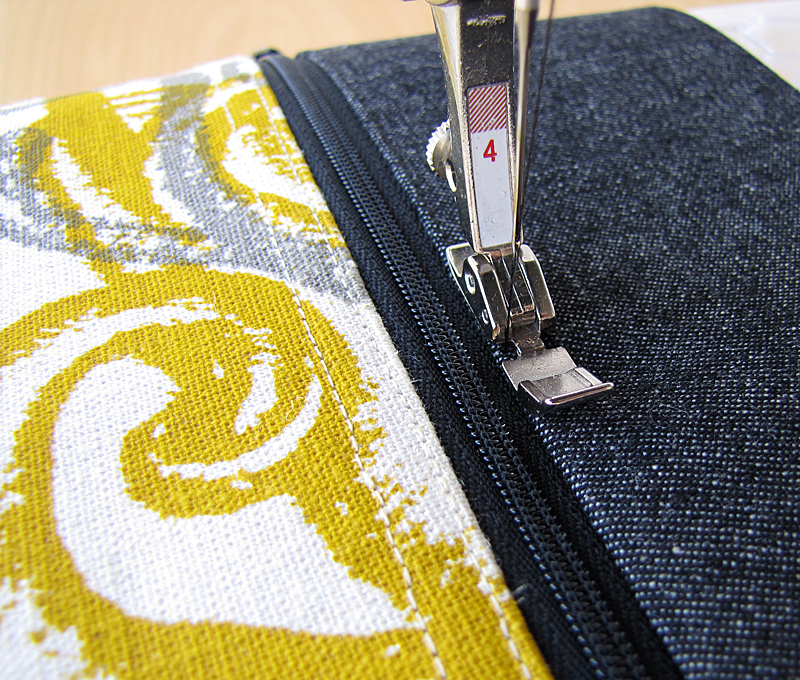
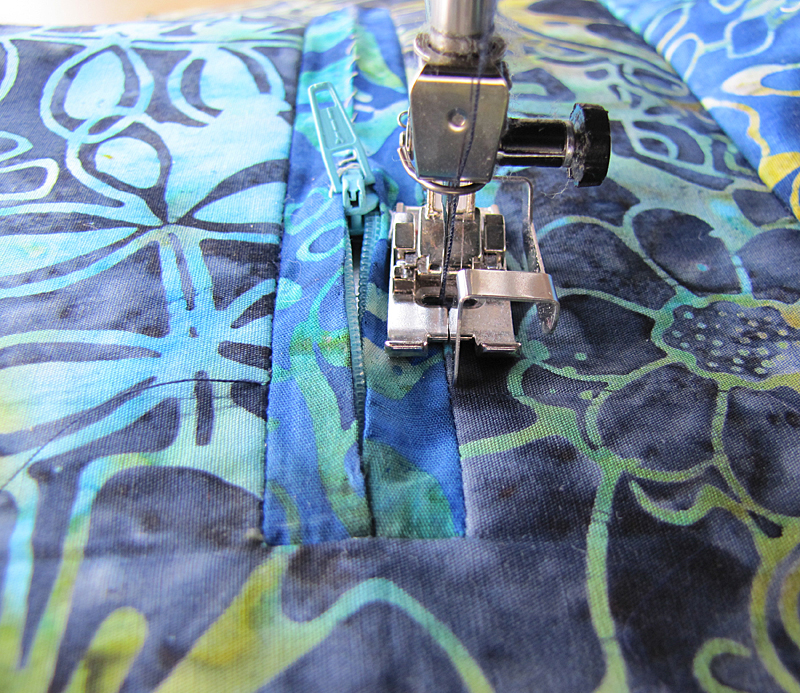
Topstitching with a Zipper Foot
As I mentioned earlier, there are presser feet to help keep an even stitch or an even distance from an edge, and it’s important that you get to know your own machine well enough to choose the right one for the project and fabric at hand (sometimes it’s a walking foot, other times a denim foot, edge-stitch foot, quarter-inch foot or the usual, normal presser foot). The rest of even topstitching is about practice, so just keep doing it until you get good at it.
Until you are absolutely sure that you can sew straight (and you will be able to, if you keep practicing), use a thread color that matches your fabric. Don’t go for contrast feature stitching if your stitching is going to be wonky; you’re only going to make a feature of the fact that you’re a beginner. Thread that blends in can hide a multitude of stitchy sins.
If you are using topstitching to hold one piece of fabric to another (for example, a patch pocket or folded bag strap), stitch as close as possible to the folded edge of the piece that you’re attaching. I’m talking 1-2mm (1/16 inch), which is pretty close! This will hold the edge flat and reduce the likelihood of any seam allowances fraying and poking out at a later date. To make the whole thing look very flat and sharp, stitch a second row, 6-10mm (1/4 to 3/8 inch) from the first, to trap the seam allowances within the topstitched area.
I could go on and on with tips large and small here, but I may get in trouble for giving away the content of my books. If you want a chance to win your own copy of my book The Better Bag Maker, you can leave a comment here with a little tip of your own… Perhaps a gadget, technique or an area of concentration and care that made a difference to the way that you sew. (The publisher will send the winner a softcover copy within the USA, digital elsewhere.)