
You will need:
- Ornament Template
- Felt squares in red, green, and brown (an 8 inch square piece is ample) + a small piece of white felt for the robin’s eyes
- 2 yards of 3mm satin ribbon in Christmas-y green or red
- A small amount of toy stuffing to pad the decorations
- A handful of red sequins for the stocking and reindeer
- Sewing thread in red, brown and green
- Embroidery thread in green and red
Instructions
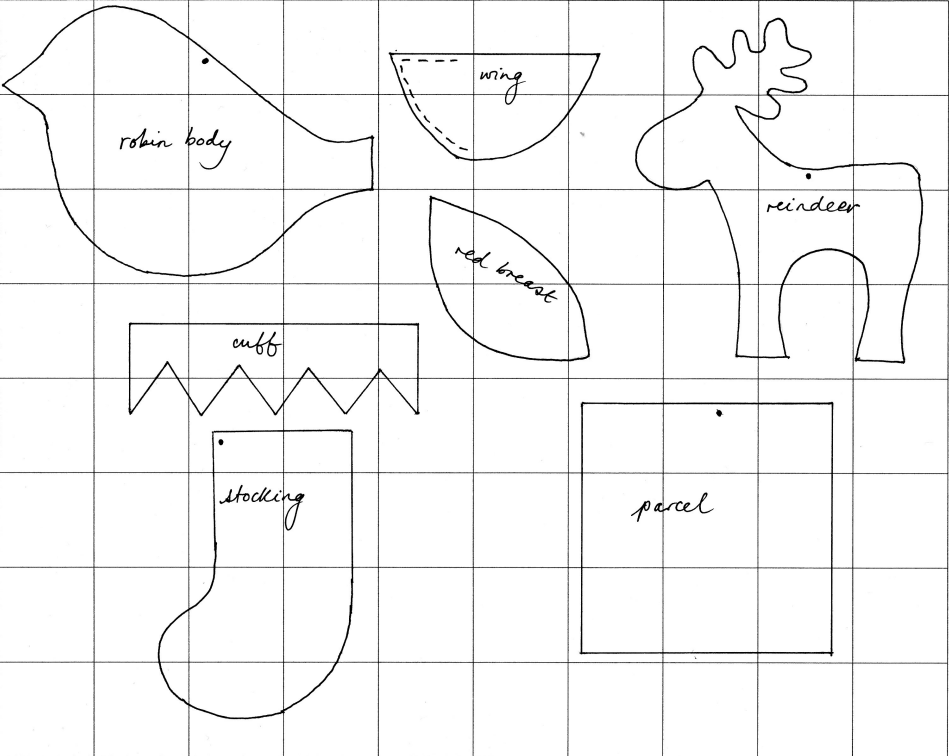
Use the Ornament Templates to cut out your pattern pieces from felt (the grid is 1” squares if you prefer to draw your own pattern pieces or have problems printing to size). Cut two of each piece for the front and back of your decoration, except for the stocking cuff (cut 1 only). You will also need to cut a 10 inch length of ribbon, knotted into a loop, for each decoration.
Parcel
This is the simplest of the decorations. Just place the two squares together and, starting at the mark, stitch around them with a running stitch, tucking in a small amount of toy stuffing/wadding and your knotted length of ribbon just before you reach the end. Ensure your ribbon loop is secured in place by your final stitches.

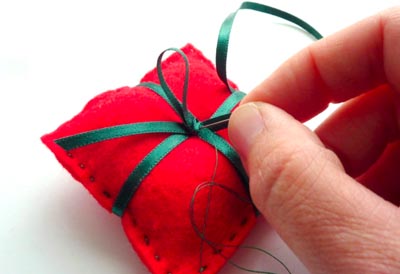
Finish and cut the ends of your thread. Take a 21 inch length of ribbon and use it to tie a big bow all the way around your felt shape.

Trim the ribbon ends to the same length. Use a length of ordinary sewing thread to secure the tied bow in place with a few small stitches so that is doesn’t come undone, pulling the stitches fairly tightly from the back of the parcel to the front; this will give your parcel a pleasingly puffy shape!
Robin
For the robin, you will use ordinary sewing thread to stitch around your two robin body pieces using an over-edge stitch. Start at the dot, inserting your stuffing and ribbon loop as above.
Finish with a double stitch or knot. Next stitch the robin’s red breast in place (with the bottom curves of the body and breast pieces lined up) using the same method.
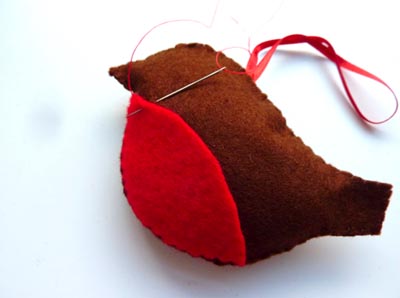
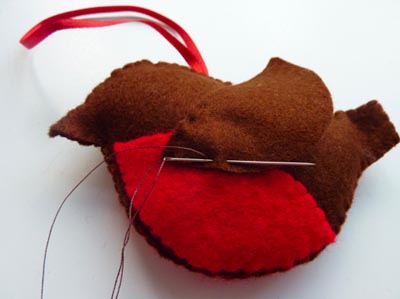
The wing will be secured by just a few stitches on the inner (armpit!) and top edges, as marked, leaving the rest of the wing free. For the eye, cut two circles in white and brown felt, the white circle slightly larger than the brown one. You will layer the smaller brown circle on top of the white circle, securing both in place with a stitch around the brown circle through the layers of felt.

Follow the same process for the other side of the robin.
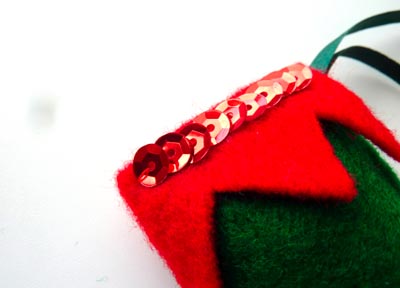
Stocking
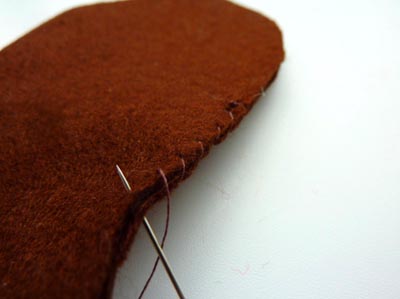
Place your two stocking pieces together and, starting at the dot, stitch around the edge of your stocking pieces using a small running stitch and a few strands of embroidery thread (leaving the top edge free). Do not cut or secure the embroidery thread yet. At this point tuck in the stuffing and ribbon loop at the inner corner, then wrap the zig-zag cuff piece around the top of the stocking (raw edges will meet at the top inside corner) and carry on stitching across it using the embroidery thread, stitching through all the layers and making sure you have secured your ribbon loop in place.
To finish, stitch the sequins in place along each side of the cuff. To do this, secure a length of ordinary sewing thread to the cuff on the inside edge with a few overlapping stitches, then pull it through the hole in the middle of your first sequin. Make a stitch to the left side of the sequin through the cuff and straight back up again. Bring the thread up through the hole of a second sequin which will now overlap the stitch on the first and stitch in place as before.
Follow the same process for each of the sequins on both sides so that your stitches are hidden (only the last stitch will be visible).
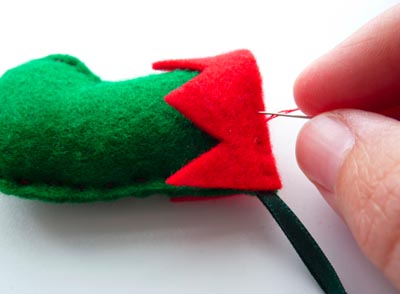
Reindeer (Rudolph!)
Place the two reindeer pieces together and, starting at the dot in the middle of the back, use red embroidery thread and small running stitches to stitch all the way around the edge leaving out the antlers. Just before completing the stitching, stuff a small amount of stuffing between the two layers (you can use a pointed tool to work it in to the legs) and tuck in the knotted end of the ribbon, making sure this is secured in place by your final stitches.

To finish, add a red sequin on each side of the nose. Secure your thread on one side of the reindeer at the marked point then pull up through the middle of your red sequin on the first side. Insert your needle on the outside of the sequin through the felt and pull up through the hole in the middle again.
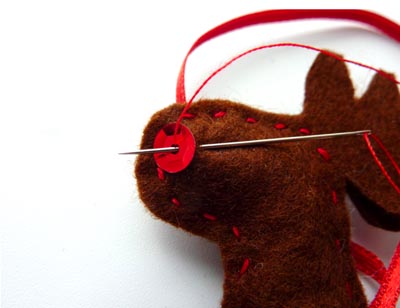
Make two more evenly-spaced stitches like this to secure the sequin (each stitch will be a third of the sequin) then pull the thread through to the other side of the reindeer and repeat these steps to secure the second sequin in place. Part your reindeer’s antlers slightly and hang him on the tree!
Hang all of your handmade decorations on the tree, and remember to take them down on twelfth night!