You may be a complete novice in the market for a new machine and all the paraphernalia that comes with it, or an old-hand who could sew her way out of a… well, somewhere difficult to get out of. But either way, we all soon come to realise that some tasks just aren’t easily surmountable without the right feet.
Attaching your feet…
The first thing to think about with feet is how easy they are to attach to your machine. On my old machine I had to use a small screw to change feet – this was time consuming and eventually led to the screw threads being worn down and the feet becoming loose.
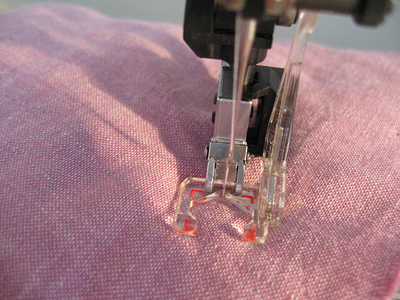
My current machine allows the feet to be easily snapped on and off in less than a second (pictured above), which is fantastic if, like me, you rarely stick to one foot during a sewing session.
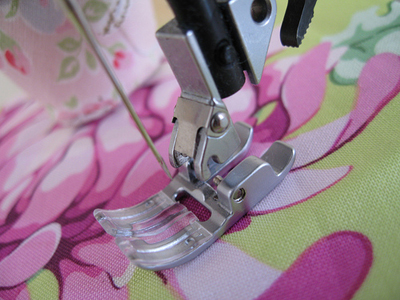
Standard Presser Foot
This holds your fabric nicely in place with an even pressure.
It allows you to use a straight stitch or a zigzag and is universally useful. In theory you could sew almost exclusively with this foot…but you may find it easier to achieve the finish you want if you venture a little further into the vast array of the specialist feet that have been designed for use with particular sewing tasks in mind. Despite its fabulousness the Standard Presser Foot has one fundamental problem in that it doesn’t address the issue of differential feed.
Walking Foot
Differential feed means that the two layers of fabric you are sewing together are fed through the machine at very slightly different rates (the fabric nearer the feed dogs moves a fraction faster) and can mean that despite your finest efforts at pinning everything in place perfectly, when you come to the end of stitching a long line of fabric one piece of material appears to have mysteriously become a centimetre or two longer than the other! This can be traumatic in any number of projects, but is most especially irksome in installing zips and aligning patchwork squares.
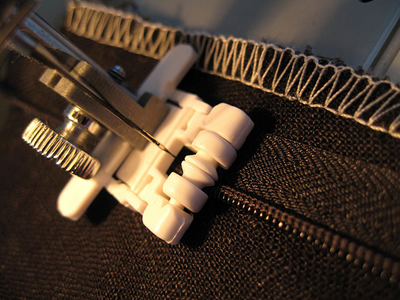
But fear not, the Walking Foot is the perfect remedy to this problem, and acts to feed both pieces of material through at exactly the same rate. A walking foot can be bought as an add-on accessory to be attached to your machine and will do the job perfectly. A Walking Foot is especially helpful when working with slipperier materials.
However, an add-on walking foot can be very noisy, clunky and eventually cause irreparable wear and tear to your machine, as it did to mine – this is my old walking foot pictured above.
Integrated Walking Foot
There are a few machines on the market that come with an integrated walking foot and having tried both I can now attest to the utter brilliance of having one welded to the frame of your machine, if not your person!
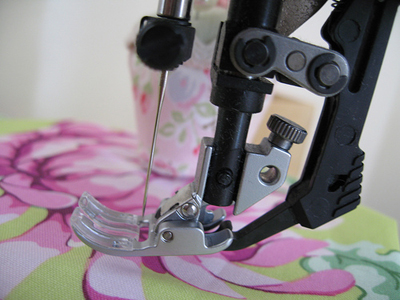
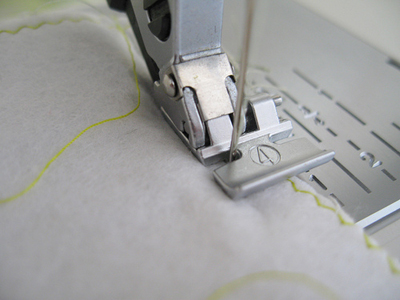
This system is often referred to as integrated dual feed. When it’s inbuilt it isn’t just confined to usage when you want to stitch in a straight line, it can also be kicked into action with the flick of a finger and used in combination with your zipper foot, appliqué foot, quarter inch foot and any other number of feet where you want to gain from that particular foot’s specialist features whilst not losing the ability to feed both your pieces of fabric through the machine at the same rate.
The picture above shows the integrated walking foot that I have on my current machine it’s the large black bit and it easily slots into a little hole at the back of whatever foot you happen to be using. An Integrated Walking Foot is so quiet that one is not wracked with sewing guilt when machining past midnight. Again, a Walking Foot produces fantastic results when working with slipperier fabrics.
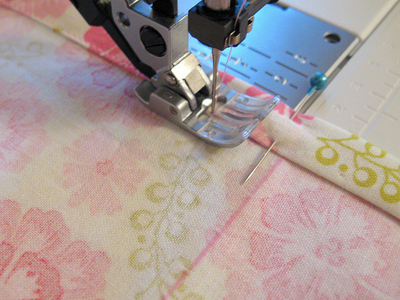
The Quarter Inch Foot
This is the foot that I probably make most use of. It means that you never have to carefully draw seam allowance lines onto fabric again and instead you may let this foot guide you into achieving a precise ¼” seam allowance.
You simply butt your fabric up to the metal guide attached to the foot and then sew happily away. It even has red markers on it so that you know at which point you should stop sewing when it’s time to turn a corner. I find this so utterly pleasing and know that it will be the delight of fellow neat-freaks out there who aspire for the handmade to look like it’s been made by a precision robot rather than a real person.
It is perfect for sewing together patchwork squares, bag making (which is what I predominantly use it for) and many other things. Previously when designing a bag pattern I would have to make one template with a seam allowance included and another one without, so that I knew exactly where to sew. This double process is now, happily, a thing of the past. The only limitation of this foot is that any attempt to zigzag or change your needle position from central will be rewarded with a broken needle.
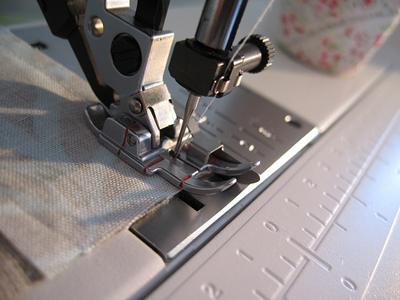
Adjustable Guide Foot
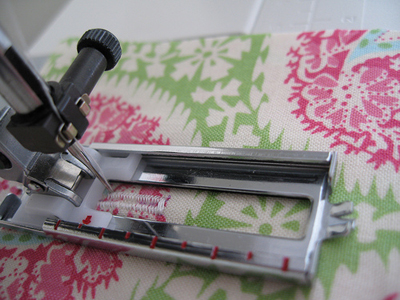
The Adjustable Guide Foot acts in the same way as the ¼ inch foot, but is highly adjustable and allows you to use a variety of needle positions, and yes, you can even zigzag if that’s what’s required!

While I use mine as a seam allowance guide, it is especially designed to help you achieve perfect top stitching. On my version, pictured above, the guide doesn’t slip around without asking, due to the super little ratchetty notches. You can use it in exactly the same way as the ¼ inch foot by butting your fabric edge up against the side. Its limitation is that it doesn’t allow for smaller seam allowances…which means that, despite its flexibility, I use it a lot less than my Quarter Inch Foot.
Open Toe Appliqué Foot
My Quarter Inch Foot may be most frequently used, but my Open Toe Appliqué Foot is one of my dearest possessions. It may well be inanimate, but it’s utterly lovable.
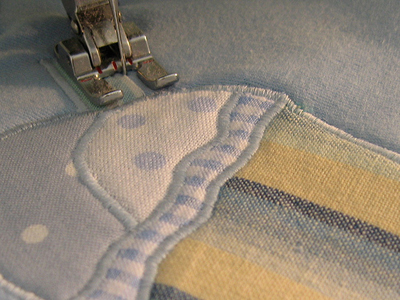
It allows the user to create pictures with fabric and generally play like a child let loose in a classroom full of art supplies, under the dignified guise of seamstressing. What’s special about this foot is that you can see exactly where you are going, which is essential when turning tight corners around appliqué pieces. It seems to place less pressure on the fabric than a Regular Presser Foot, while holding the fabric in place to either side of your appliqué edge. Using this foot you can appliqué using a straight stitch or a zigzag stitch. It is useful for any task where you need greater visibility of your work than a Regular Presser Foot will provide.
Zipper Foot
The Zipper Foot allows you to sew closely alongside against anything that is too bulky to put under an actual foot, and so in effect, it is the sewing equivalent of riding a horse side-saddle.
A zipper foot can be used not just to insert zips, but also to install cording or piping into cushions and bags. My zipper Foot can be mounted on either side so that you can sew on the left or the right. This is a foot that requires the careful use of your fingers. You must feel for the zipper teeth or cording that are sandwiched in between your outer fabric and your lining and then butt the side of the zipper foot up against the teeth or cord, hoping that you are the winner in this particular game of hide & seek.
If your machine comes with a variety of needle positions then you have control over how close to the zipper teeth you wish for your stitches to be. When you reach the zip-pull you must raise the foot, pivot a little, and ease the pull back before resuming sewing again. At first the Zipper Foot can seem fiddly, but I found that an intensive week of immersing myself in projects involving zips had the eventual effect of making its use seem no more complex than reversing into a space at the supermarket.
Concealed Zip Foot
A concealed zip (also: Invisible Zipper) is most often used in clothing, where to have the zip’s teeth visible would be an eyesore. Although using my standard zipper foot it would be possible to install a concealed zip, I find the Concealed Zipper Foot makes the job much easier.
While the Standard Zipper Foot was compared to riding your horse side-saddle, this foot is more like using a lightweight steamroller (do the analogies ever end?!). It gently glides over the zip teeth catching them to one side or the other of the roller. Your stitches are formed incredibly closely to the zip’s teeth for a neat, precise finish.
It is very easy to use and tends to produce perfect results every time, due to the fact that it leaves little room for human error, the concealed zipper foot lets you see exactly where you are in relation to the zip and the foot intuitively follows the groove that it has found around the zip’s teeth.
Buttonhole Foot
The instructions for creating buttonholes on my machine are shown in the lid (shown below).
Some of the more fancy-pants machines may have a quicker and easier one-step route to buttonhole loveliness which may be worth looking out for when buying a machine, but my machine is a workhorse and so requires me to go through five quick and easy steps. The Buttonhole Foot has an internal section that slides up and down across your fabric helping you to create your buttonhole. Proper preparation is essential to make good use of your buttonhole foot. You should always use a stabiliser beneath your fabric when creating a button hole– it will keep your buttonhole smooth and free from puckering.
I tend to start by placing my button on the fabric and drawing a little line at each side to make sure my button hole is the perfect size. I then draw a vertical line between the two horizontal lines and this forms the line for the buttonhole, which can be followed with your machine. Once your machine has helped you to create your superduper button hole you will need to open it up with scissors or a seam ripper. A moment of overzealousness here, however, can result in you accidently barrelling through the end of your previously beautiful button hole. For this reason I slide a pin in horizontally just before the end stitches which acts like a safety buffer…and makes the ripping much more fun. Buttonholes will have their own day in the sun during Sewing Machine Month in a week or two, so stay tuned for more information and tutorials.
Big Foot
The Big Foot is used for free-motion embroidery. Using this foot, I’ve seen other people create the most amazing things that leave me feeling quite giddy… but to master it requires practice and a dedication that I, unfortunately, don’t seem to be in possession of.
In order to do free motion embroidery or use the Big Foot it is imperative that you are able to lower the feed dogs on your machine. These are the things that usually do a super job of feeding your fabric through the machine. But for free-motion you take over in this job and without any feed dogs to boss you around, you have the freedom to twist and turn your fabric exactly as you please. The machine no longer regulates the stitch length for you and it becomes your responsibility to keep the fabric moving at an evenly-paced speed in order to maintain a consistent stitch length.
You can appliqué fabric pieces with it, as well as creating beautiful quilts, where the sewer is able to produce loopy, undulating waves of stitches which can result in a look that is far cosier and more informal than the alternative of quilting in straight lines (which is what I tend to do). To use it you must either create a quilting sandwich (cotton & batting etc) or else place your fabric in a special machine embroidery hoop with a stabiliser beneath, never a single layer of material.
In Conclusion
I have included here the feet that I use most often, but have omitted the Overcast Foot, the Piping Foot, the Twin Welting Foot and many others that I have in my box of feet, because some seem to end up being more useful than others, depending on what type of sewing you tend to do most.
Don’t be afraid to invent your own uses for your machine’s feet; trial and error tells you what is the easiest way for you to do something. During a particularly blurry moment I once snapped my Standard Zipper Foot onto my machine back to front and found that it awakened a whole new range of possibilities for use (at your own risk!) and have frequently used it that way ever since.
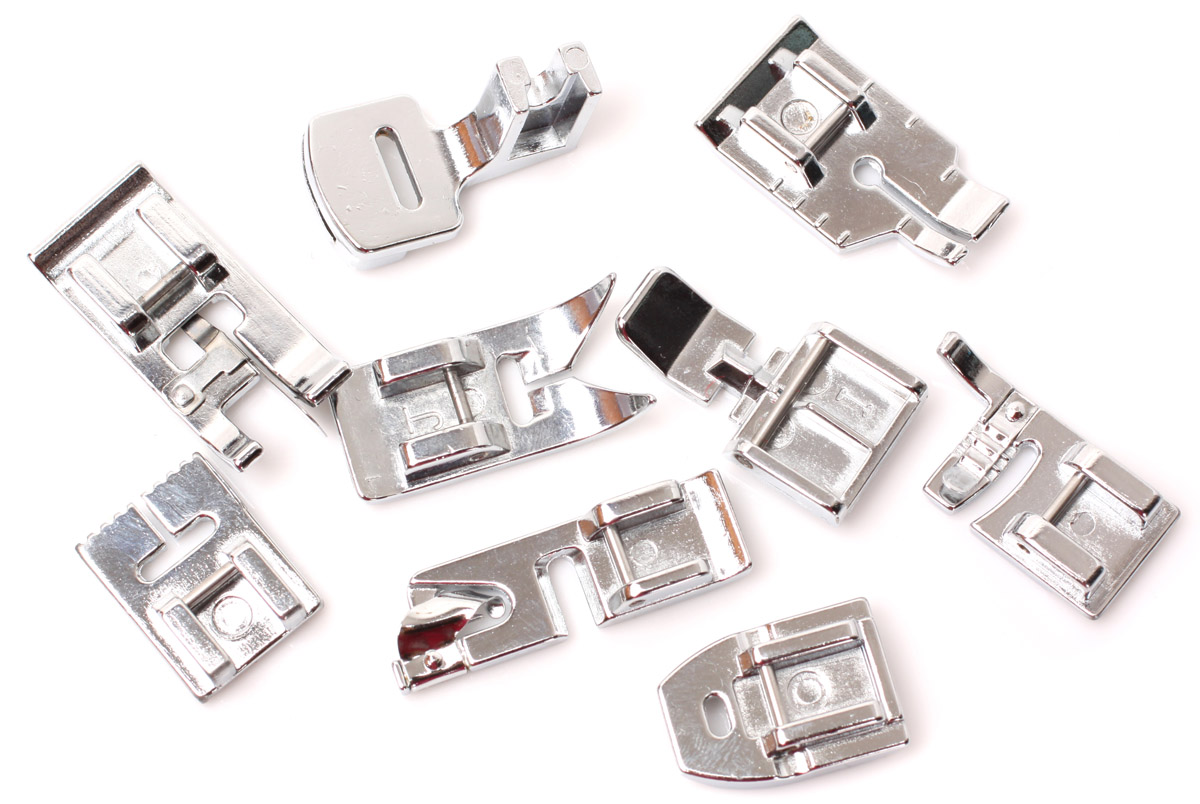
The feet discussed above are the feet that I use most regularly, but actually my machine’s manufacturer’s catalogue that I gaze upon on a regular basis tells me that my modest collection is really just the tip of a foot-filled iceberg. But, as with books or wooden toys, they never feel like a frivolous waste of money, for they have the ability to help to make anyone’s stitchery more perfect and do better justice to the beautiful stash of fabrics that passes fleetingly beneath a machine’s feet.