Some might say that simply getting a garment finished is good enough and for those of us with sewing rooms full of unfinished projects, we might not disagree. Today we are talking about taking our garment sewing to the next level. By pulling out the stops on our finishing techniques we can make our garments look so professional that friends will doubt we made them ourselves.
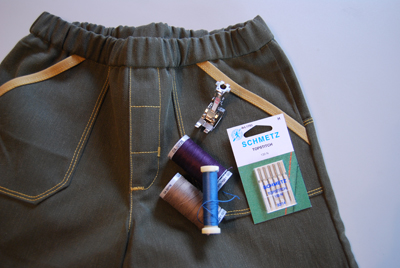
Topstitching
Topstitching is usually done to add a professional and finished look to garments, but it can also be used to hold layers of fabric in place and prevent facings from shifting while being worn. Topstitching is always done on the right side (or “top” side of the garment) because tension differences will often cause the stitches on the top to be of better quality. The only difference between topstitching and edge stitching is that edge stitching is specifically near the edge of the garment.
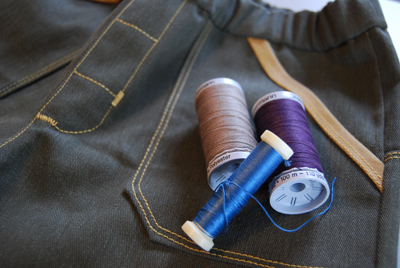
The most important tools for good-looking topstitching are quality thread, a new needle, and an edgestitching foot. There are a lot of excellent thread choices available, and you want to be looking for thread that has long fibers and little to no lint or fuzz so that your stitches can be seen individually. Lengthening your stitches a little bit will also improve this. Special topstitching thread is extra thick and usually requires that you use special topstitching needles that sport a large eye. Regular thread and universal needles will also work well, especially on light weight fabrics that would be overpowered by the thick thread.

By changing your needle before you begin topstitching, you are ensuring that you won’t have skipped stitches or other problems with stitch quality. A dull needle is sometimes hard to detect by feel or sight and even the slightest damage can cause your stitches to look less than perfect. Lastly, using a presser foot with a guide will keep your stitches in the straight little row you want them in.
Pressing
The easiest of all finishing techniques is pressing. Using as much heat as is appropriate for our fabric, press firmly downward, without sliding the iron back and forth. Using tools such as a pressing ham or sleeve board can help us get to tricky corners or three dimensional areas like darts. A press cloth is sometimes necessary to prevent shine and to prevent scorching the fabric. If you don’t have one of the fancy Teflon press sheets, you can always use a piece of muslin.

To steam or not to steam? I keep a spray bottle of water and a spray bottle of liquid starch at my ironing board and keep my iron bone dry. I have had more than one sad experience of a steamy iron spitting dirty water on my fabric and have also watched fabric shrink and distort with excess steam. That said, if you are working with all natural fibers that you have prewashed in hot water and heat dried, your fabric shouldn’t shrink at all. If you know your iron is very clean inside and you allow it to heat up before using it, steam away! The steam will penetrate through the fibers and make your pressing go faster.
If you are pressing a particularly stubborn fabric, consider using a clapper. This wooden tool comes in a variety of shapes and is used to hold a pressed area until it cools. If your fabric allows, steam the area and then press the clapper down. The wood holds the steam without adding any heat, so you don’t have to worry about scorching your fabric. Since heat forgets and cool remembers, your pressed and cooled seam will stay pressed.
Neat & Tidy
Lastly, be sure to trim all of your threads. I use a small pair of very sharp scissors so I can cut threads very close to the fabric. Or I leave long threads and then tug on the bobbin thread. This makes the top thread pop to the back of the garment where I can tie the two threads together and trim them. This ensures that the last stitches won’t come undone and work their tails to the right side of the garment.