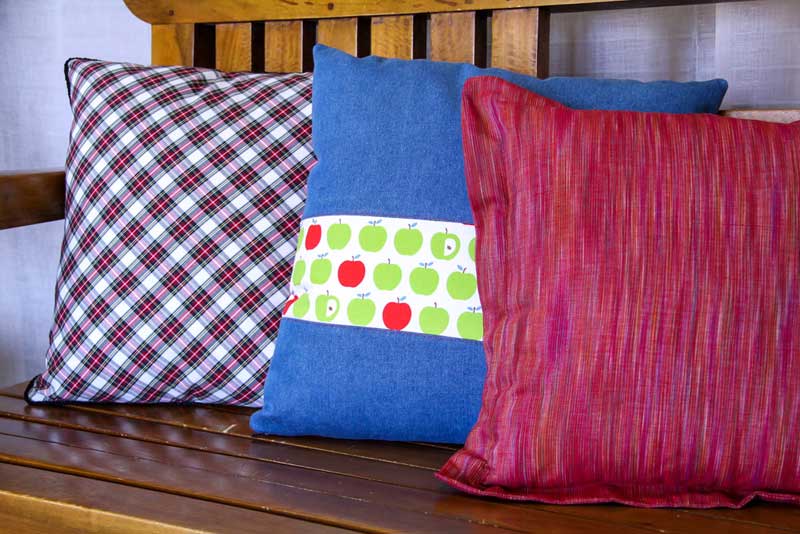
Making your own throw pillows is a great way to showcase your personal style. The small size makes them the perfect place to use orphaned blocks or mini quilts. Or simply add a little panache to linens and denims for one-of-a-kind throw pillows.
While envelope-style pillow covers are simple and quick to make, putting a few extra steps into making your covers can make a world of difference in how they look. For a more professional appearance and one that will have people wondering “Where did you get those beautiful throw pillows?” I have a few tips for you:
Make it tight. Make your pillow cover an inch smaller than your pillow form. If you’re using a 20-inch square pillow form, then make the pillow cover finish as a 19-inch square. A 16-inch pillow form would call for a 15-inch pillow cover. This helps ensure that the pillow cover is full and doesn’t droop or sag.
Keep it consistent. Make yourself a pattern using Swedish Tracing Paper or your favorite pattern making material by tracing out a square the same size as your pillow frame, then stitch with a 1/2-inch seam allowance.

Taper those corners. Over time, super-square pillows develop floppy little dog ears at the corners. They only worsen over time, so nip them in the bud by trimming the corners of your pillow pattern before you start cutting for your fabric.
Mark five inches from each corner, on each side. Then mark 1/2-inch in from each corner. Use an acrylic ruler and draw a line between the marks to taper the corners. Cut along marks using a rotary cutter or sharp scissors.
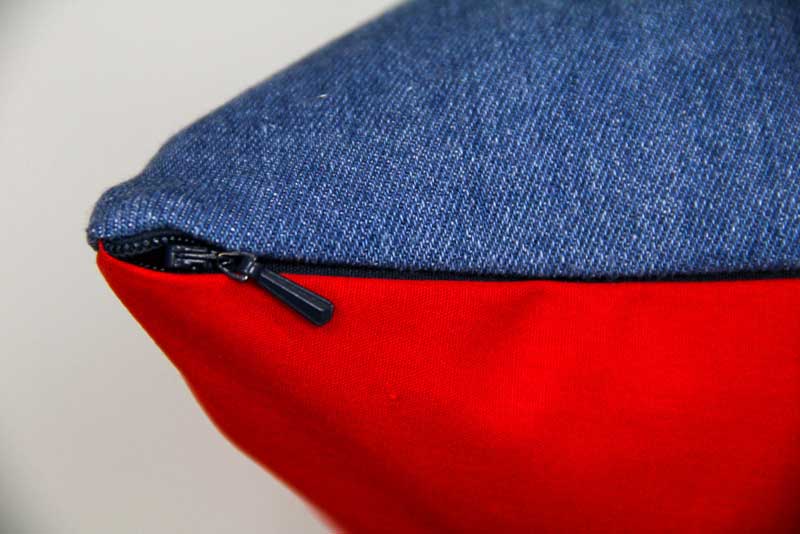
Give it closure. While envelope-style pillows are quick and easy, they also tend to look quick and easy. Using a lapped zipper, invisible zipper or buttons adds a little panache and holds your pillow form closed.
Add some flair. You can add a lot of panache with a few finishing touches:
- Create a two-inch flange by making the pattern four inches bigger and, after completing the outside seams, stitch two inches in from the edge. (Use buttons or a center back seam to insert pillow form.)
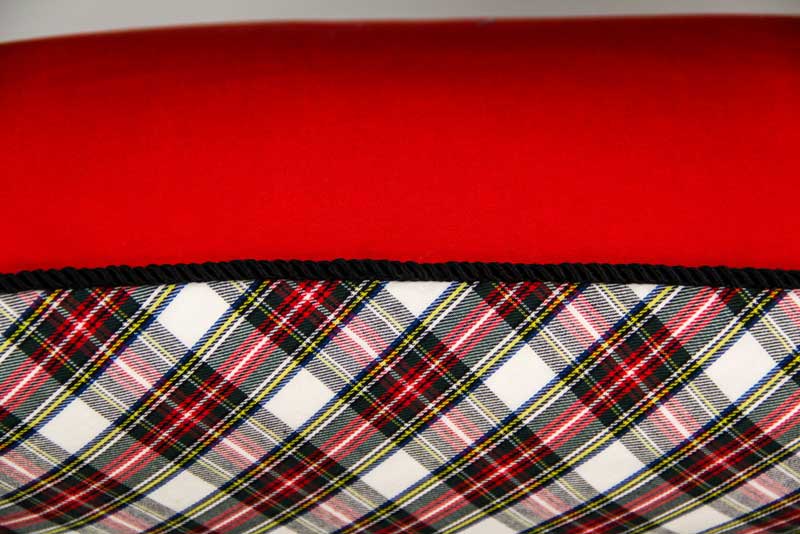
- Stitch piping or ready-made ruffles into the seams for an added bit of color and interest.
- Piece the fronts or add a bit of English paper piecing.
- Add covered buttons to highlight designs or on the corners.
Stuff it right. Grab the highest quality pillow form you can afford. Down/feather-filled forms give the most professional look, but some foam pillows are suitable. Give the forms a good squeeze and see how you like the feel.