Hello, I’m Dana and I’m a big fan of ruffles. Little girls and fun, flouncy ruffles just seem to go together. I feel honored to join with Best home idea today to share a tutorial on how to add ruffles into the neckline seam of a little girl’s dress or top.
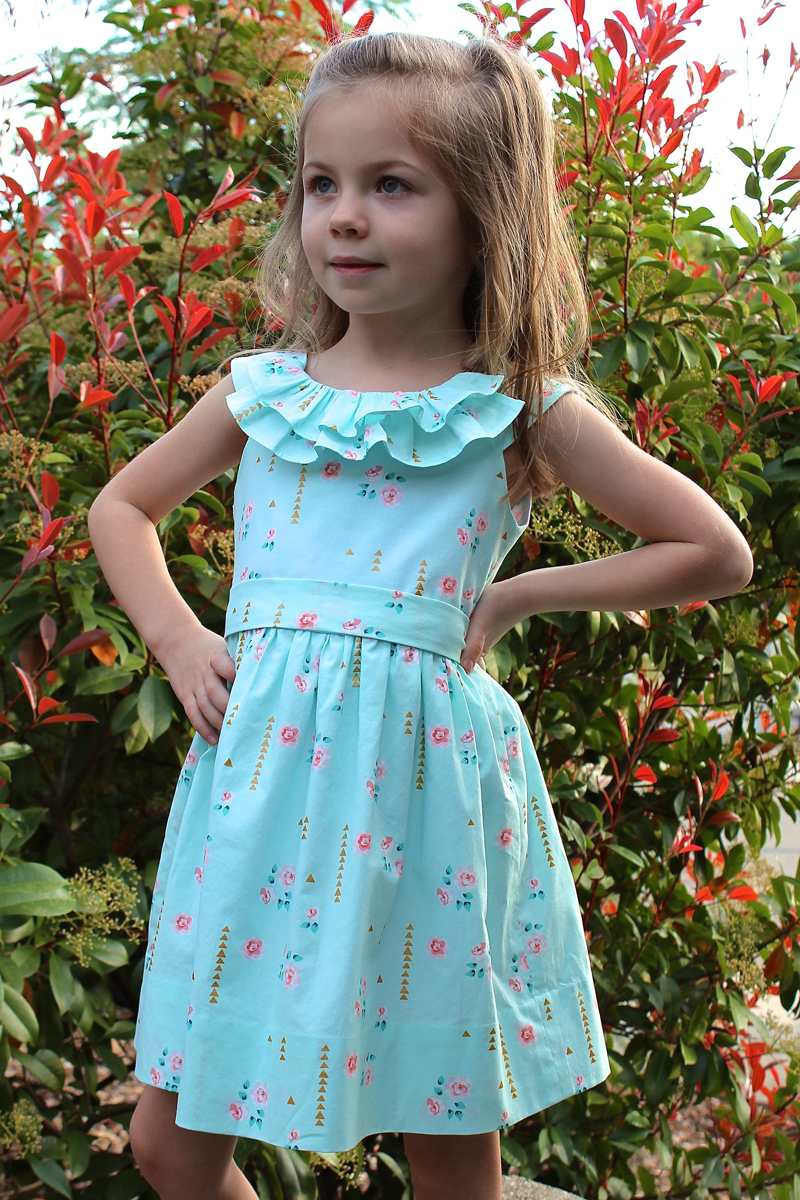
The techniques that follow can apply and be used to modify many patterns with rounded or straight necklines, and varying sleeve or shoulder strap styles. Ruffles give a soft, flowing look to a dress. It’s perfect for that summer garden feel. The detail they add can also dress up a pattern, transforming a basic bodice into a more feminine look.
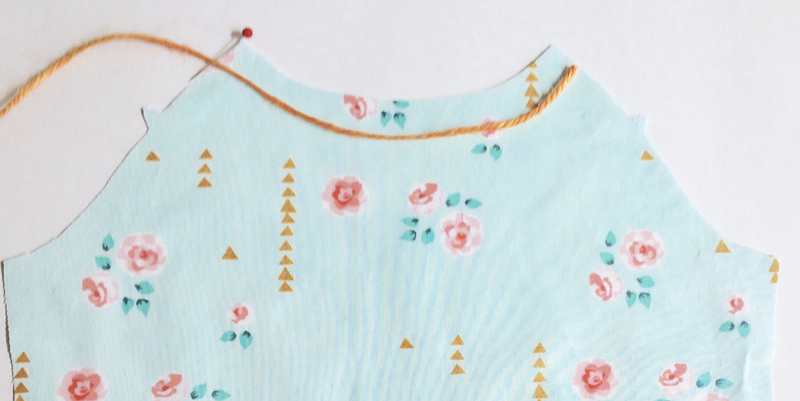
Use a string or yarn to help you measure the curved neckline of your front bodice piece.
Mark the end point with a pin of the string with a pin.
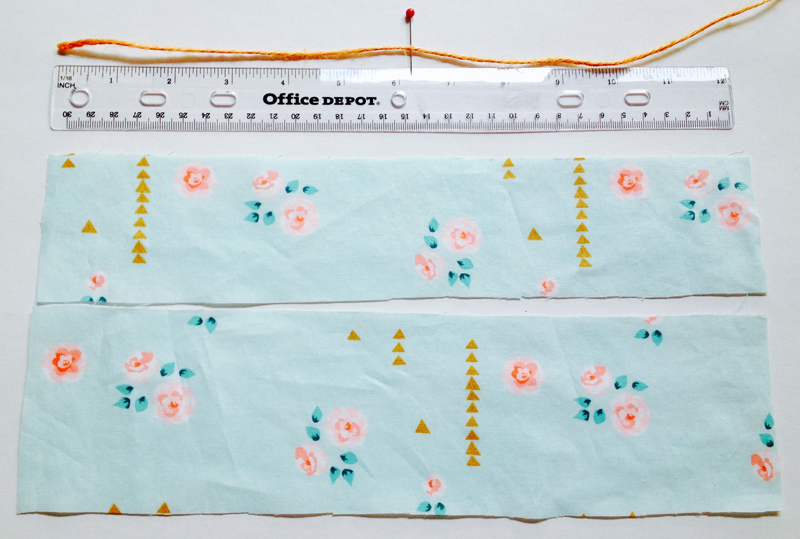
Multiply the neckline length by 2 and that is the length for cutting the ruffles.
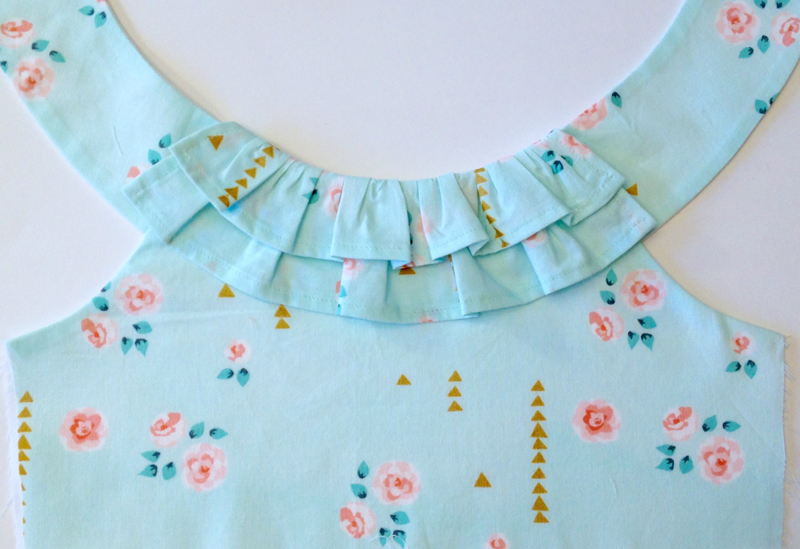
For example this size 2 dress has a neckline that measures 6.25”. 6.25 x 2 = 12.5”, so I cut both ruffles to a length of 12.5” long.
The larger, bottom ruffle should be 3/4” “taller” that the top ruffle so that it hangs down lower.
I use a ruffle “height” of 2.25”-2.75” for the smaller ruffle and 3.00” – 3.5” for the larger ruffle, depending on the size of the dress.
Cut out both ruffle pieces across the width of your fabric.

Press the two short ends and the bottom long end of each ruffle in 1/4”.
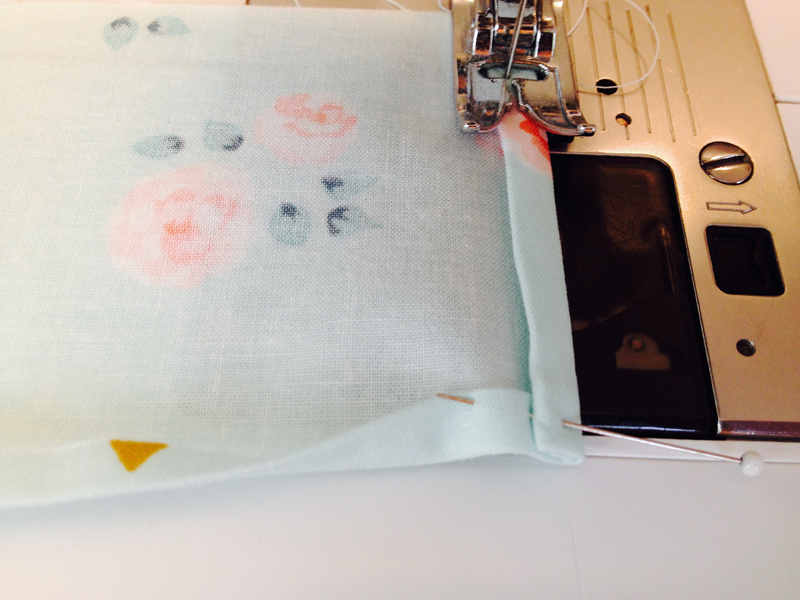
At the sewing machine, ruffle wrong side up. Starting at the upper right hand corner, fold the already folded edge in a second time, again folding in 1/4”. Start with a few back stitches and then stitch the folded edge, continuing to fold as you sew along. Before you get to the lower corner, fold the long edge up a second time and pin it under the short edge fold making a nice sharp corner. Pivot and proceed down the long edge. Fold in the left end at the next corner, pivot and continue to sew up the other short edge. End with a few back stitches.
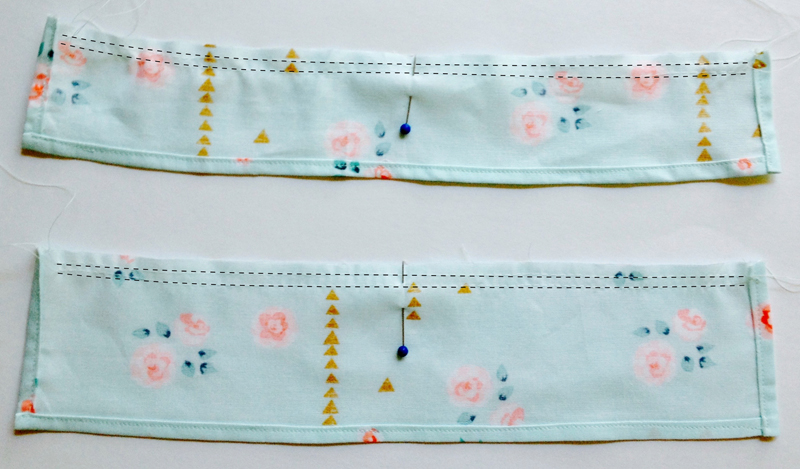
Sew two parallel lines of gathering stitches 1/8” and 3/8” from the un-hemmed edge.
With a straight pin, mark the center point of the top long end.
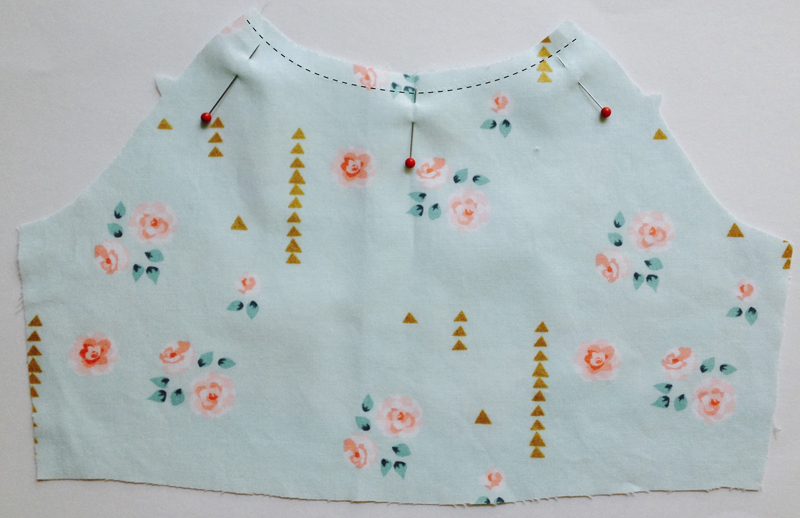
Stay stitch across the neckline 3/8” from the edge.
Place the bodice front on a work surface, right side up. Pin mark the center of the bodice neckline.
Pin mark the bodice neckline 5/8” in from the right hand and left hand sides.

Place the larger ruffle right side up on the bodice with the center markings matched up and the ends of the ruffle lined up with the 5/8” markings. The raw edges should be matched up.
Pull the gathering threads to gather the ruffle to the same length as the neckline, minus the 5/8” on each side. (See arrows.)
Adjust the fabric so the gathers are equally distributed. Pin the ruffle into place every inch, with pins perpendicular to the neckline.
Machine baste ruffle in place 1/2” from raw edges. Pull gathering threads out.
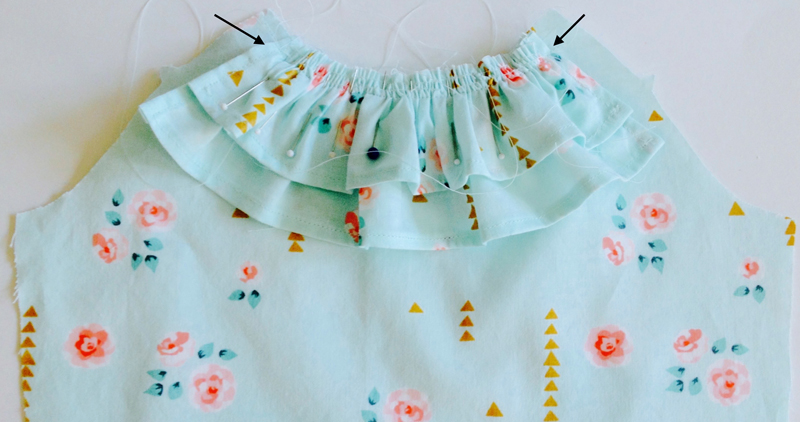
Place the smaller ruffle on top of the larger ruffle with the raw edges aligned.
Gather, pin and sew in the same manner as the first ruffle, with the stitching directly on top of the first basting stitches. Remove gathering threads.
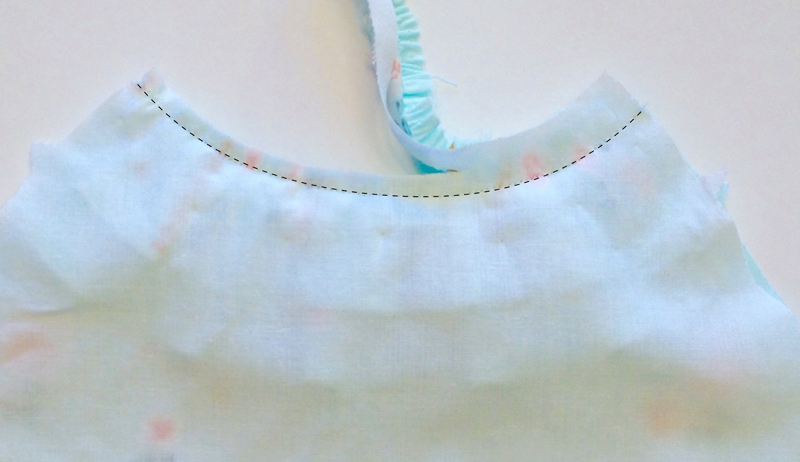
Lay the bodice front right side up on a flat surface and place the bodice front lining on top of it. Pin the lining to the bodice front along the neck edge only. Sew a 5/8” seam along the neck edge. Trim seam allowance to 1/4”.
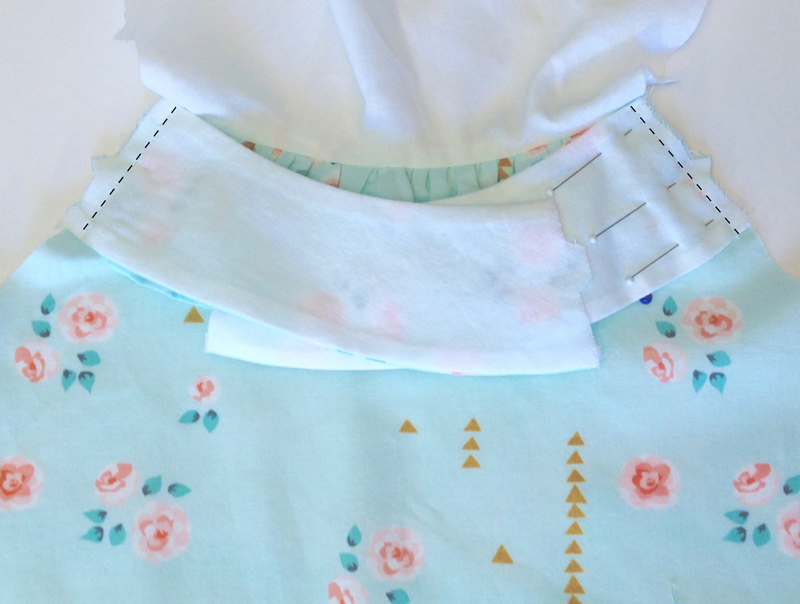
Pull the lining up out of the way.
Pin the ruffles away from the side edges to keep them out of the way.
Pin the prepared shoulder straps to the bodice with the inner edge tucked right up close to the neckline seam.

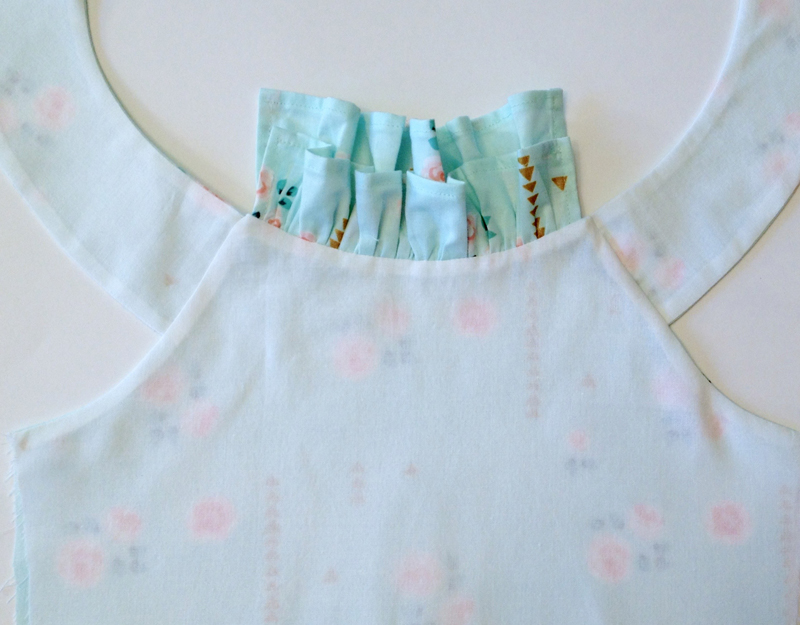
Pull bodice lining back down over the bodice. Align bodice “armhole” edges with lining “armhole” edges. Pin in place, taking care not to get ruffle caught up in the seam area.
Starting at one of the neckline corners, back stitch, then sew a 5/8” seam from the existing neckline seam to the bottom of the “armhole”. Backstitch. Repeat for other side -Trim the seam allowance to 3/8” and clip diagonally across the neckline corners.
Turn bodice front right side out and press. Use care to press edges so that the lining does not show from the front. Press ruffles down making sure that lining does not show from the front.
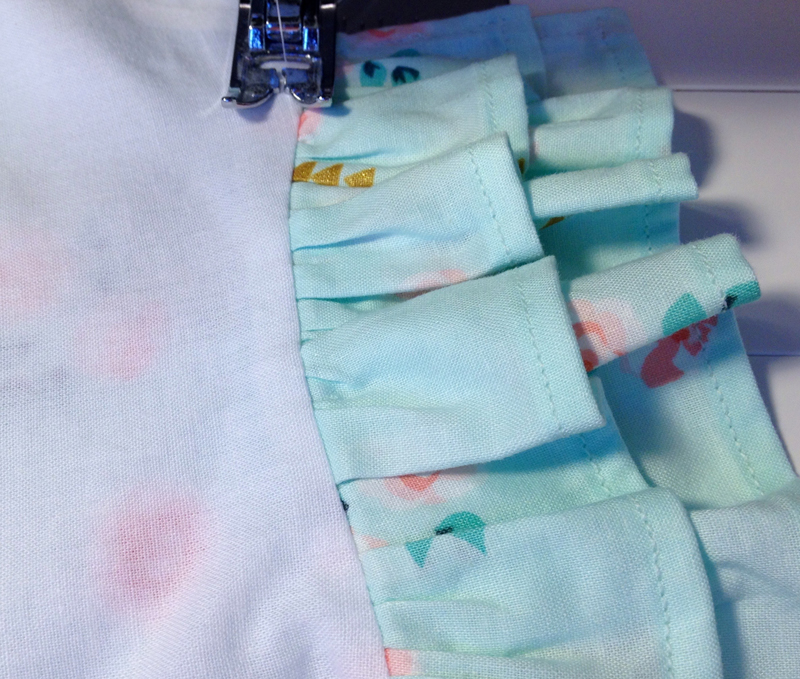
Pull ruffles up, away from bodice. Working at sewing machine, top stitch through the lining and the bodice fabric about 1/4” down from the neckline seam. Start and end the top stitching 1/2” in from the armhole edges.
Note: This stitching will help the neckline seam to lay flat, and help to keep the lining from showing from the outside of the dress. It will not be seen because it will be underneath the ruffles.
Here is a close up of the top stitching.
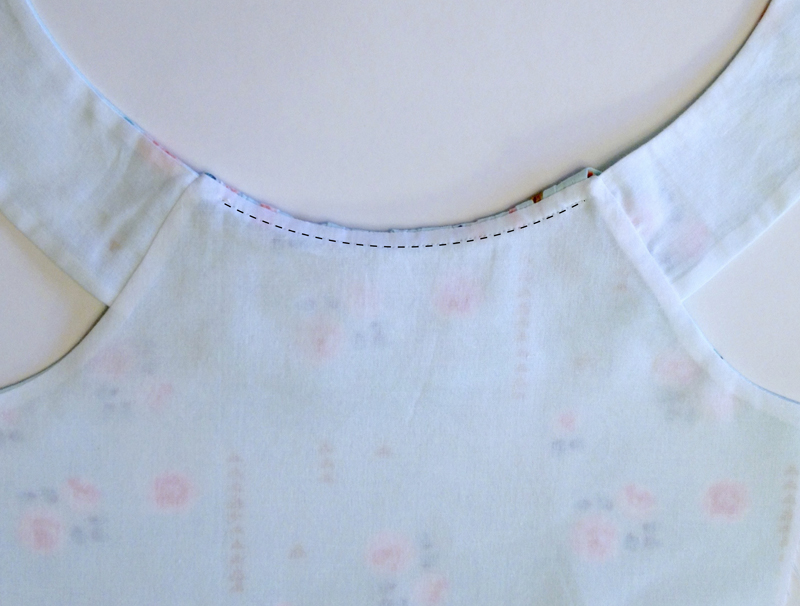
The ruffles are in place and the bodice front is now ready to be sewn to the back…
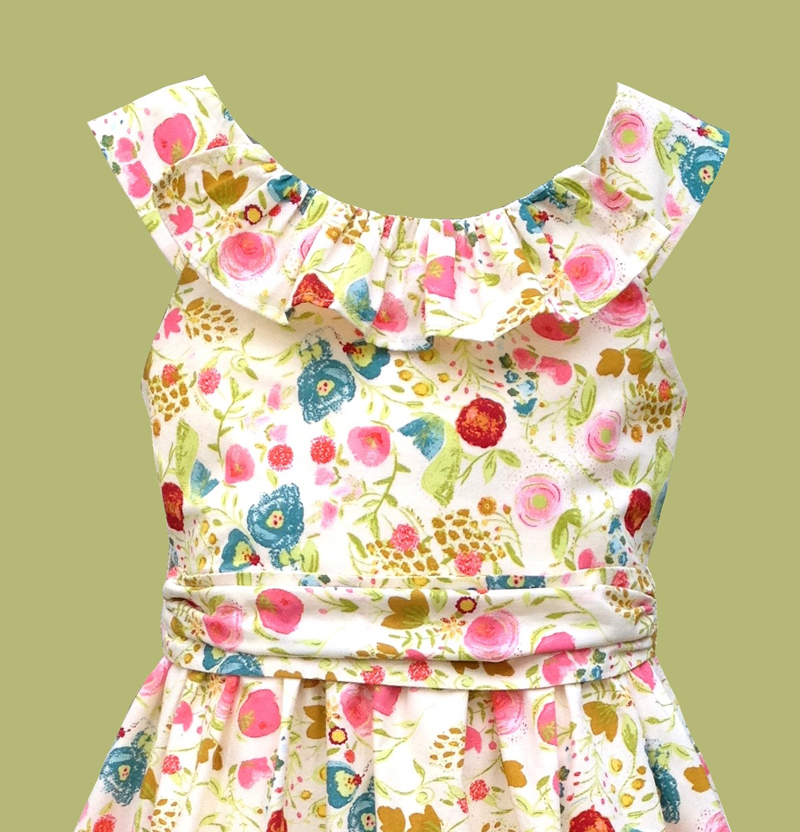
For another version of this dress I used only one ruffle. The technique is the same, you just don’t add the second smaller ruffle.
I hope you found this helpful and that you’ve been inspired to add a ruffle or two into your sewing world.