Seams So Simple! from Mary Elizabeth Kinch of Small Pieces, Spectacular Quilts:
Sewing with small pieces is incredibly addictive and wonderfully fun. Be forewarned! Their adorable diminutive size will capture your creative heart, and the myriad of pieces and possible fabric combinations will have you running to your stash to dive into a project. Using a stiletto and the following tips on seam allowance accuracy, you should be able to avoid what my friend Nancy refers to as “inharmonious moments” and ensure your quilt top goes together smoothly.
Small pieces require just a bit more attention when stitching them together. A deviation of 1/16” on a block can quickly multiply across a quilt top and become a difference of an inch or two. Here are some tips for success with a bonus that you can apply this knowledge to all your quilting projects… It works for big blocks too!
- Verify your measurements and cuts. Be consistent in using the same place on the line on the ruler… Just on the inside of the line, down the middle of the line or just to the outside of the line.
- Sew with a scant 1/4” seam allowance-– This is a seam allowance that is about a thread width less than 1/4”.
- Gently finger press or, if using an iron, use a light up and down motion to avoid stretching the block.
- If you change threads, test your seam allowance accuracy again. In piecing this size, an extra ply or bit of thickness can affect your accuracy.
Making a sample block is a good way to assess where you need to guide your fabric on your machine to get an accurate seam allowance. On my machine, with my favourite thread, I need to run the fabric just inside the 1/4” guideline on the throat plate. After years of sewing, this “happy seam spot” on my machine just comes naturally to my hands!
Take 4 – 2” x 2” squares. With right sides together, sew together two squares, using a scant 1/4” seam allowance.
Open out the unit and finger press the seam allowance in one direction. Finger pressing is gently rolling the fabric to open the seam and firmly pressing it between your thumb and forefinger.
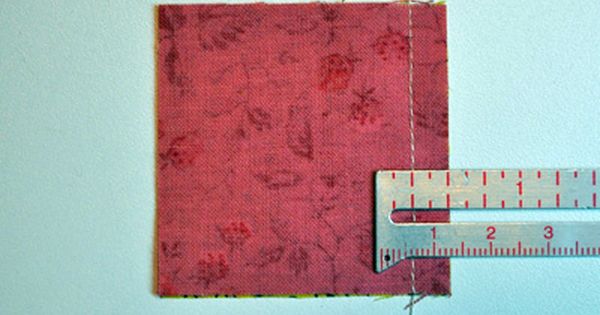
Measure the width of this new unit. It should measure 3 1/2”. If the unit measures smaller than that, make your seam allowance slightly smaller. If it measures larger than that, make your seam allowance slightly larger. Repeat for second set of squares. Measure. Adjust if necessary.
Take the two units, butt seams with seam allowances in opposite directions. Sew together. Finger press the seam allowance to one side. Measure. It should measure 3 1/2” in both directions. Make any necessary adjustments to achieve the correct measurement.
To help avoid the “end of the seam wobble” (where the seam allowance narrows unintentionally for the last 1/2” of the seam) use a stiletto to guide the final bit under the presser foot.
A stiletto helps ensure accurate seam allowances, allowing you to guide small pieces under the presser foot while keeping your fingers clear of the needle. Use gentle pressure and the tip of the stiletto to steer the final bit of the piece safely to the end of the seam. Usually I have my stiletto positioned at about a 70 degree angle to the seam and my hand gently resting on the bed of the sewing table. The stiletto can also be used to help keep the edges of the pieces together for the last bit, by using the sharp tip to move the top layer edge so it lines up with the bottom one. Be sure to pull the stiletto away before it goes under the presser foot! You will be amazed at how adept you will become at using it to steer, to lift up the top layer to reposition the edges, or to help ease in a little fullness.
My favourite stiletto is one by Clover. It has an oval handle that prevents it from rolling around on my sewing table and its shape is comfortable in my hand.
You can find more tips in the book, Small Pieces, Spectacular Quilts.