I love my serger because it takes the drudgery out of hemming. For casual garments like pajamas and play dresses I almost always opt for one of the following hemming options:
Narrow Hemming
A narrow hem is a 3 thread stitch. The stitching encases the edge to prevent fraying but is narrower and less noticeable than a 4 thread stitch. This is a great stitch for heavier fabrics that will not roll for a rolled hem.
1. Unthread and remove your left needle.
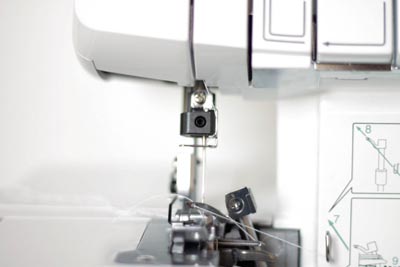
2. Remove the stitch finger from the serger. This is accomplished differently on different sergers. Mine is removed by pushing this little lever next to the orange arrow.
Some sergers have a slider that disengages the stitch finger.

If you are unsure how your particular model works, check your manual.
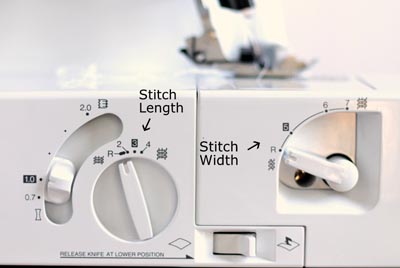
3. Change your stitch width to narrow.
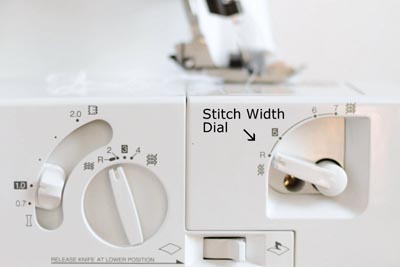
Those are the only two adjustments— You don’t need to rethread the serger or adjust the tension. Now, simply run your fabric through (right side up) for a quick hem!
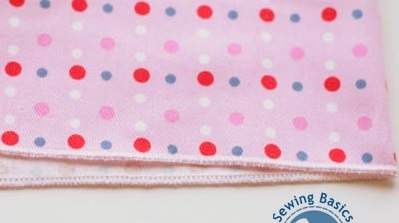
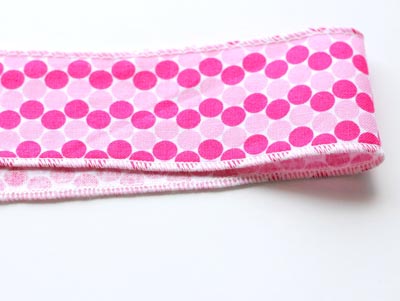
Here is a picture of a narrow hem with contrasting thread. Notice how the fabric edge isn’t turned over.
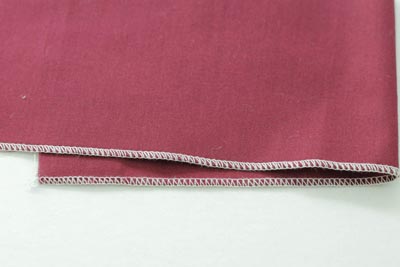
On a lighter fabric, the stitching is much less noticeable. A rolled hem wouldn’t be possible on this heavy twill.
Rolled Hemming
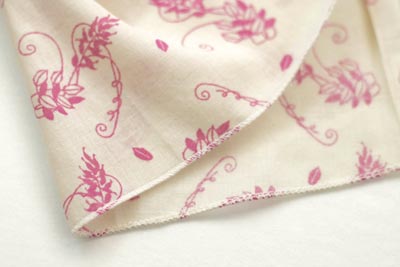
Once you’ve mastered the narrow hem, a rolled hem is just a matter of adjusting the tension to force the edge of the fabric to be pulled under to the wrong side. You’ll see rolled hems as finishes on napkins, scarves, and delicate skirts. Rolled hems work best on thin fabrics that roll easily. Here, I’m using thin cotton gauze.
1. Remove and unthread the left needle just as you would for a narrow hem.
2. Reduce both your stitch length and width. I prefer to keep my stitch length just a smidge above the lowest setting.
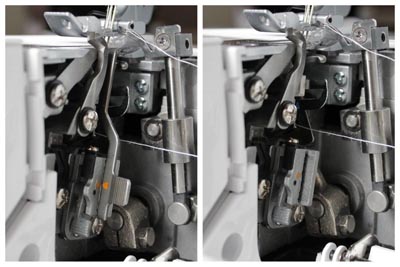
3. Increase your lower looper tension and decrease your upper looper tension.
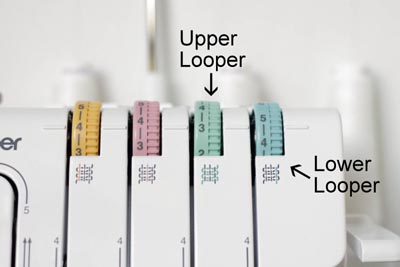
4. Begin serging with your fabric right side up. Keep checking the fabric coming out of the machine, and adjust your upper and lower looper tensions until you see the fabric edge turn under.

5. Admire your quick and easy hem!
6. To change your machine back to 4 thread stitching, simply replace the stitch finger and replace and rethread needle that was removed.
Troubleshooting
Here’s a secret: The settings in most serger manuals work best for thin, delicate fabrics. For thicker fabrics like quilting cotton increase your stitch width. This gives the fabric enough room for the edge to turn under.
You can also change the look of your rolled hem by changing your stitch length and width. Having the stitches close together produces a ‘classic’ rolled hem.
I prefer the look of a longer rolled hem stitch.

I hope this tutorial takes the drudgery out of finishing garments for you too!