Many people think that knit fabrics are scary, when, in fact, they are such gentle monsters-– kind of like Muppets, really. Although they’re kind of funny, they’re also super soft and pose no real threat to the motivated sewist. I’ve taken up sewing with them a lot more since having a baby-– there’s nothing better for comfort wear, and what’s more important than coziness for little ones?
The key to working with these Muppet-like knits is to know which strings to pull to get the professional-looking results that you want. I thought I’d share some of my favorite tricks:
1. Know your sewing machine or serger inside and out. You don’t need a serger to sew knits successfully, but you do need to know the capabilities of your machine. Any tips that you read online or pick up in a book won’t tell you what settings your machine needs in order to sew knits without frustration. Read the manual and set aside an afternoon to really master your machine, fiddling around with different settings and plenty of scrap fabric. If you purchased your machine (or serger) from a dealer, they usually offer free machine mastery classes for their customers. Take advantage of your dealer! I just had an issue with the coverstitch function on my serger, and I took it in and had someone sit down with me and troubleshoot. It was super helpful.
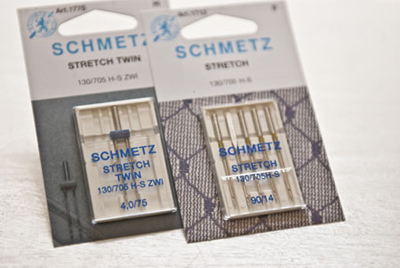
2. Get the right needles for the job. More often than not, I use Schmetz Stretch needles (130/705 H-S) for sewing with knits. On heavier-weight knits, I might use a ballpoint/jersey needle, but if I’m getting skipped stitches, I’ll switch back to my trusty stretch needle. You’ll also want to have Stretch Twin needles on hand for sewing hems and a mock coverstitch (more on this below!).
3. Overlock or zigzag stitch all seams. Knit patterns are cut with less ease because the fabrics themselves are stretchy. Think of the neck opening on a basic t-shirt-– it needs to stretch a good deal just to get over your head. So, the seams that you sew on a knit need to stretch as well, or else the thread will break. An overlock stitch on a serger is a very stretchy and strong seam, and is perfectly suited for sewing seams on knits. If you’re sewing on a regular machine, check your manual to see if it has a mock-overlock stitch or a jersey stitch. Both are well-suited for knits. The standard option for sewing seams on a basic sewing machine is to use a zigzag stitch, set to a width of .7 mm and a length of 3.0 mm.
4. Reduce the pressure of the presser foot if your seams stretch out when you sew. If you’re getting stretched-out, wavy seams, it’s likely due to too much presser foot pressure. Most machines (and sergers) have the option to lower the pressure of the foot; check your manual. If you have a serger and you’re getting wavy seams, make sure your differential feed is set to 1.5 instead of N (N is the setting for woven fabrics, 1.5 for knits).
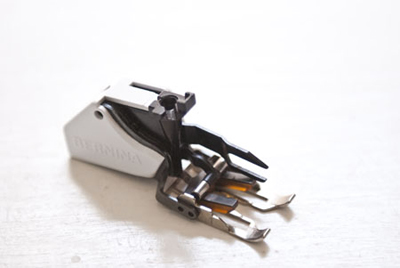
5. Consider using a walking foot. If you’ve reduced the pressure of the foot on your regular sewing machine and you’re still getting unsightly seams, try a walking foot. This nifty foot grabs at both the top and bottom fabrics and pulls the fabric through more evenly.
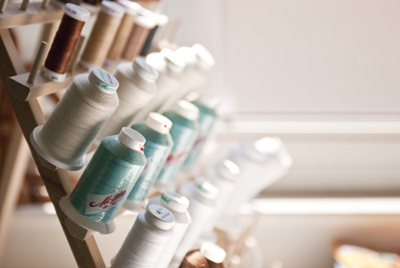
6. Use quality thread, and pick up some wooly nylon. You can always use regular spools of thread to sew knits-– you don’t need to buy those big cones. That said, if you’re using a serger, it does use lots more thread than a typical zigzag stitch on a sewing machine. Most sergers are somewhat picky about thread-– any inconsistencies in thread thickness will wreak havoc on the delicate tension balance, resulting in skipped stitches, broken threads, or other ugliness. Stick to quality cones, such as those made by Mettler, and you’ll save yourself a lot of frustration.
When you’re on the market for quality thread, be sure to pick up some wooly nylon thread. This usually comes in limited colors, but it doesn’t matter-– you’ll only use it in the bobbin of your machine or the loopers of your serger; in otherwords, it will only show on the wrong side of your garment. Wooly nylon is extra stretchy, making it perfect for use in most knitwear. If you use it in your serger, make sure to test your settings on a scrap piece of the fabric with which you’ll be sewing. You’ll most likely have to fiddle with the recommended tension of the needles and loopers, as wooly nylon has different properties than regular thread. Once I find the setting that works perfectly for wooly nylon on any given knit fabric, I write down the “formula” and keep it posted near my serger, so the next time I work with a similar fabric, I’ve cut down significantly on my guess work.
7. Know how to make a professional-looking hem finish on your regular sewing machine. Even if you’re lucky enough to have a serger, you probably don’t have a coverstitch machine. (Some sergers have a combo overlock/coverstitch function, like mine, but it can be a bit of a pain because I have to do some extensive re-threading if I want to switch between functions.) A coverstitch is comprised of the two parallel lines of stitching that you see on the hem of your t-shirts, which has a looping stitch on the wrong side of the fabric. The coverstitch is stretchy, and creates a very professional finish when it comes to knitwear. Perhaps you were worried that your knit garments will look too homemade because your only option for hem finishing was a zigzag. The good news is that you don’t have to shell out another $800 just to be able to sew a coverstitch. You’ll just need the following:
- a machine that allows you to sew with a twin needle (most do)
- a Stretch Twin needle in either 2.0 or 4.0 mm width
- wooly nylon thread
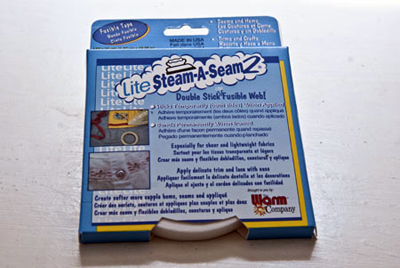
- Lite Steam-A-Seam 2, 1/2” wide
1. Follow the manufacturer’s instructions to fuse the Steam-A-Seam tape to the wrong side of the fabric, about 1/8” from the raw edge that you wish to hem.
Remove the paper backing, then fold the sticky tape to the wrong side of the fabric, using the edge of the tape as your folding guide. Press again following the manufacturer’s instructions. You should have a 5/8” hem.
2. Hand-wind a bobbin with wooly nylon thread (don’t stretch the thread too tightly as you wind) and insert your bobbin. Since a mock-coverstitch isn’t quite as stretchy as a real coverstitch, the wooly nylon will create extra give in your hem, assuring that you won’t snap any threads during everyday wear and tear.
3. Change out your regular Stretch needle for a Stretch Twin needle. Check out your sewing machine’s manual for instructions on how to thread a twin needle. Thread, then test your stitch on a scrap of your fabric. If you’re getting a ridge between the two lines of stitching, you need to reduce the top tension. (Mine is usually at a 4 or 5, but I turn it down to 1 for mock-coverstitching.)