Kelly Lee-Creel and Rebecca Söder show you how to add handmade elements to make your celebrations extra-special in Handmade Hostess: 12 Imaginative Party Ideas for Unforgettable Entertaining. The book includes 36 sewing and craft projects plus lots of desserts (and tons of inspiration!). The parties are organized by season (Summer Fourth of July Picnic, Spring Japanese Garden Party, etc.) and the book includes helpful advice about how to prepare for your next hosting opportunity, minus the stress! Today Kelly shows you how to use an interfacing technique– used in the book to make fabric flowers– to make fun fabric feathers!

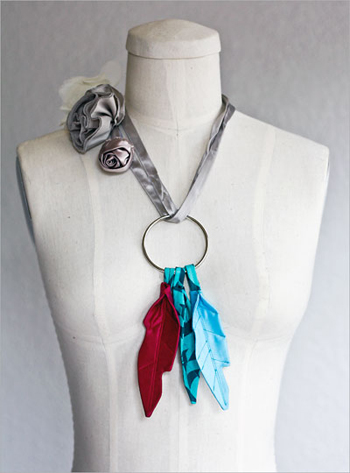
In my new book, Handmade Hostess, I wanted to sew some fun, whimsical decorations for holidays and special occasions– things like Santa’s sleigh, a laundry line of leprechaun clothes, and large-scale fabric flowers.
However, seam allowances can be tricky when you are sewing something with an unusual shape. One of the techniques I use in the book is sewing without seam allowances. I cut my shape from fusible interfacing and rather than fuss over cutting out and lining up complicated pieces, I use the interfacing as a template when I sew.
Today I made up a new shape– a fabric feather– so we can practice together. You could use these feathers as a keychain or a present topper or even hang them from a mobile!
What you need:
- Scrap piece of medium or heavy-weight interfacing (I like Pellon Décor Bond for this project)
- Fabric: 2 pieces measuring 3” x 6” and 1 strip measuring (1 ¾” x 3”)
- Feather template
- Chopstick or fabric turner (optional)
- Hand sewing needle and thread

Feather template
1. Trace the Feather template (small or large) onto the interfacing and cut it out. Fuse the interfacing to the wrong side of the fabric using the manufacturer’s instructions.
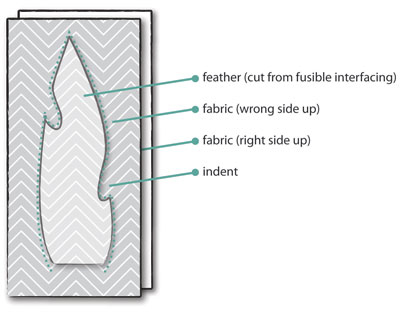
2. Place the fabric with the interfacing on it right side down on top of a second piece of fabric, and pin around the outside edge of the feather.
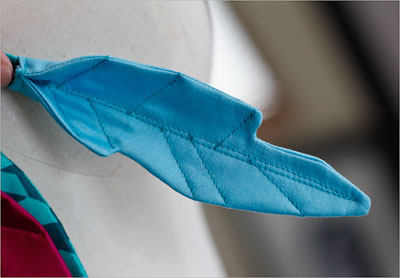
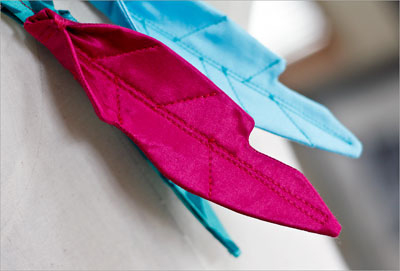
3. Stitch around the feather shape leaving the bottom open as indicated. Do not worry about being precise at the indents. Feathers are organic shapes. No two are alike!
Tip: Decreasing your sewing machine’s stitch length to 1.0mm or 1.5mm when you reach the point at the top will make it easier to turn your work.
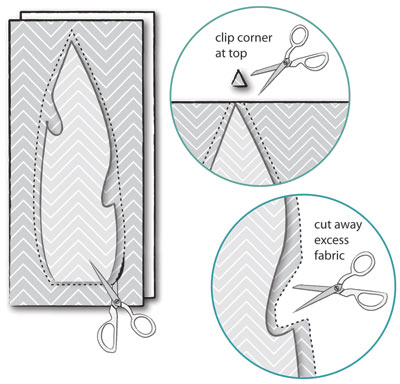
4. Cut the excess fabric away 1/4” to 1/8” from the edge. Cut across the corner at the top and remove excess fabric from the indents, but do not worry about clipping curves.

5. Fold the 1 ¾” x 3” strip of fabric in half lengthwise and press. Open up the fabric and fold the long edges in towards the center, and press again. Fold the fabric in half and top-stitch to create the feather’s stem.
6. Turn the feather inside out using a chopstick or other fabric turning tool to smooth open the seams. Press well.
7. Embellish with stitching to decorate as shown on the template.

8. Tuck in loose ends at the bottom of the feather. Fold the feather’s stem in half and insert the raw edges into the opening. Top-stitch across.
9. Pinch end of feather in half, and using a hand-sewing needle and matching thread, whipstitch the ends together.