Melissa loves to sew and to teach others how to sew! Hers easy how-to for half-square triangles (or HSTs) will get your mind spinning with possibilities!
I love the combination of versatility and interesting, easy techniques and that is why I was crazy in love when I discovered half-square triangle making (or HSTs). Half-square triangles are surprisingly easy to make but look really difficult and that certifies them as the perfect project for bringing on that awesome sewist feeling.
As a self-taught crafty gal, I really appreciate when things work in a way that is intuitive but also creatively challenging. As an aside that sometimes means I don’t really bother with proper titles and such… I mostly go for it. So, if there are technical terms for things I am doing and I neglect to mention them please do let me know. I love to learn more!
Here is how to make these fantastic HSTs.
Supplies you will need:
- Two squares of fabric– one printed and one solid– cut at 7″ X 7″ (Or any size, really… Just know that your HSTs will end up being 65% the size of your original cut squares.)
- Standard sewing supplies including a clear ruler, rotary cutter and self-healing mat
Instructions:
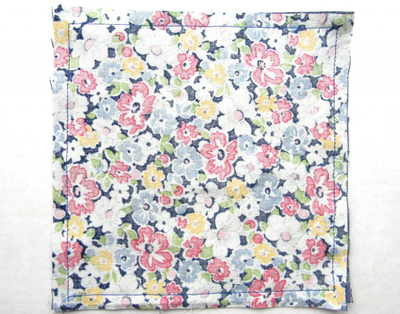
1. Place the two squares right sides together and sew around all four edges as below:
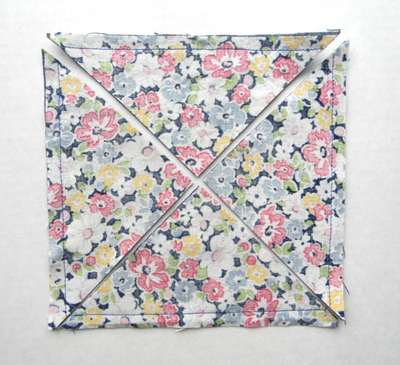
2. Use a clear ruler and set it across the middle of the sewn square. Be sure to position the ruler such that you will be cutting through the point where your stitches meet at each opposing corner. Once you have the ruler lined up, cut using a rotary cutter. Repeat across the other direction.
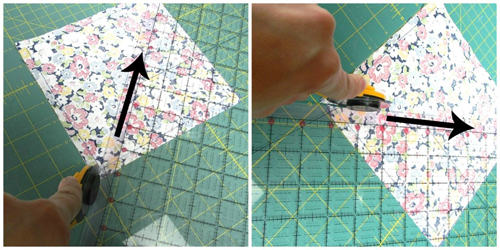
3. The result this will be four half-square triangles. all cut up into 4 triangles
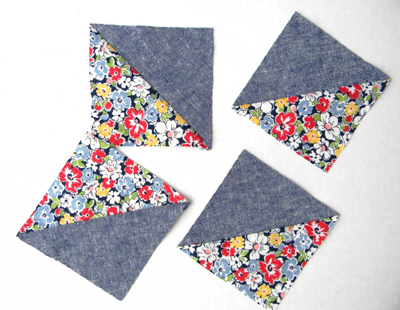
4. When you press open each one and clip off the exposed seam allowances, it will look even more impressive. Nice, huh?!
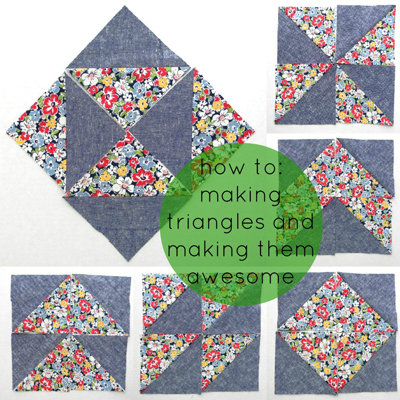
Now, it’s possible to start making the triangles awesome!
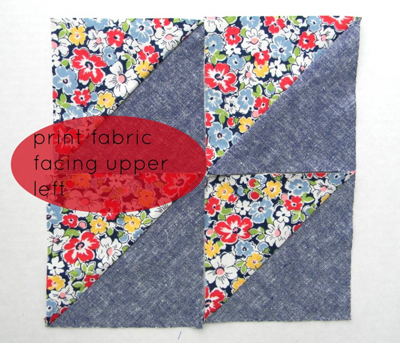
1. This style is simple but elegant. With two on the top and two on the bottom sew each HST alongside each other with the print half of the square on the upper left-hand side. As simple as it is, this style can look so elegant repeated on a quilt.
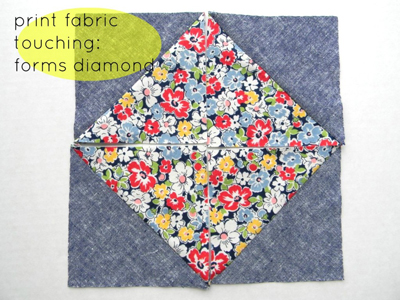
2. To create a diamond, place each printed side of the fabric toward the middle.
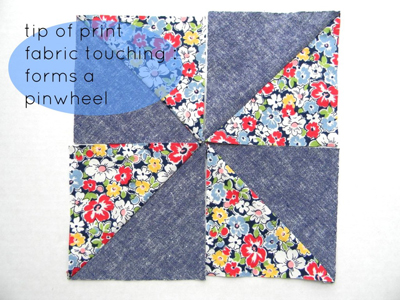
3. To form a pinwheel, move clockwise from the top left placing each printed fabric on the right-hand side with just the tip of the print touching in the center.
4. This is a kind of flying goose style and is formed by placing two HSTs with the prints together and toward the center. Repeating the same for the bottom two.

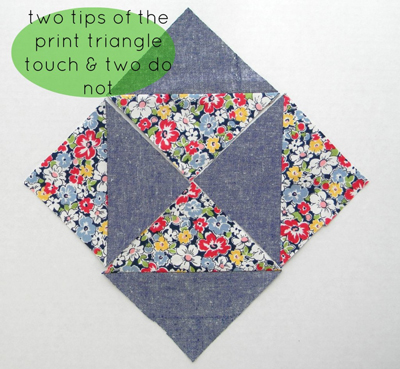
5. I like to call this one the ‘egg timer’ but I have no idea if that is correct or not, I just made it up because that is what it looks like to me. Alternate each HST, moving counterclockwise with one print facing out and the next facing in toward the center repeating with the bottom two HSTs. Then rotate the whole thing to form a diamond.
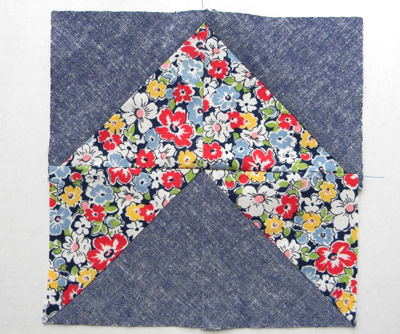
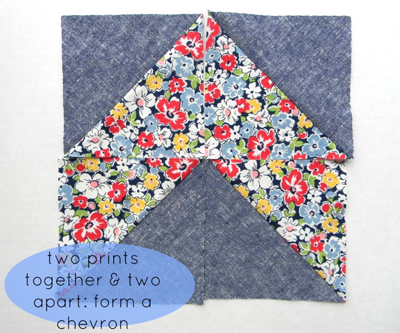
6. Last but not least is the chevron. It is one of my favorites. Simply place two of the HSTs alongside each other with the prints together and then do the opposite for the other two HSTs below.
As far as sewing it all together, the trick is really to maintain a 3/8″ seam allowance. I will walk through how to sew the chevron but the same rules apply to sewing almost any HST. Begin by sewing, right-sides together, the top two pieces. Then do the same with the bottom two pieces.

Press open the seams and sew the top half to the bottom half. The best way to be sure everything lines up is to align the center seam of the both the top and bottom before you sew them together. Don’t worry so much about whether or not the edges are aligned… It’s always easy to cut away any any uneven edges without anyone knowing as long as the center is still aligned.

That’s it! So awesome and so easy! Now, if you made a bunch more of these it would form a zigzag.