Fall is in the air, and it’s about time to break out a few autumn-y and Halloween-themed items to welcome the new season. These scary, spiderweb potholders are just in the right spirit, are super quick to stitch up, and they make a great hostess or birthday gift for a friend, too!

The fabric for these potholders came from My Modern Quilt Shop, and I love the combination of prints and colors. Both potholders use Botanics Metalllic Tangerine by Robert Kaufman on one side, and Widescreen Black also by Robert Kaufman on the other side. The binding used it to finish the edges of one potholder is Zig Zag Black by Stella, and includes a scary little spider embroidered using a zig-zag satin stitch and lightening stitch. On the second potholder I omitted the spider embroidery and used a 3-thread “wrapped” overlock stitch to finish the edge. You can vary the details to suit your machine capabilities or the time you have available—no matter what you decide they will turn out cute AND functional. Let’s get started!

Supplies:
- 1/3 yard of 3 coordinating fabrics
- 4 pieces of Warm & Natural (or similar) cotton batting pieces, each approximately 10 inches x 10 inches
- 2 pieces of Insulbrite Thermal batting, each approximately 10x 10 inches
- Matching thread
- Rotary cutter + mat
- Fabric marking pen
- Sewing machine
- Serger (optional)
Prepping the Potholder “Sandwich” for Quilting:
1. Rough cut two back and two front pieces of fabric approximately 10 inches x 10 inches. You can use the same or coordinating fabrics; in my samples I used an orange print for one side and a black print for the other.
2. If not already cut to size, also rough cut four pieces of cotton batting and two pieces of Insulbrite Thermal batting, each piece approximately 10 inches x 10 inches square.
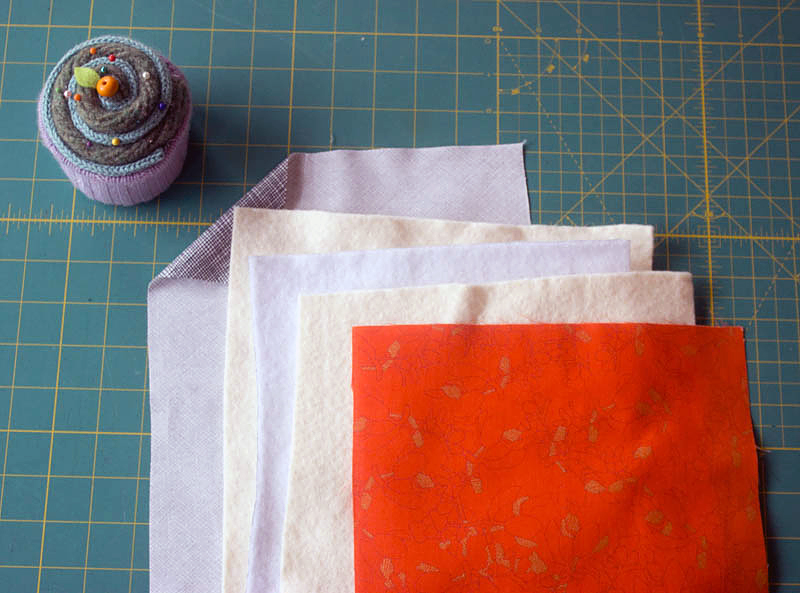
3. Create the potholder “sandwich” by placing one piece of fabric right side down, and then layering one piece of cotton batting, one piece of Insulbrite thermal batting, a second piece of cotton batting, and finally the second piece of fabric right side up.
4. Smooth and pin carefully, as this is a very thick sandwich!
Quilting the Potholder:
1. Set your straight stitch to 4.0.
2. Starting in one corner and smoothing as you go, stitch slowly in a diagonal line to the opposite corner. On the opposite side, stitch a second diagonal line, forming a large “X” on your potholder.
3. Stitch down the center of the potholder lengthwise, and then thru the center of the potholder width-wise.
4. Starting in the center of the potholder, shorten your stitch length to 1.0 and take a few stitches to “lock” your threads, and then lengthen your stitch length to 3.0. Stitch slowly in a tight spiral, turning the potholder as you go to keep your stitching smooth and curved.
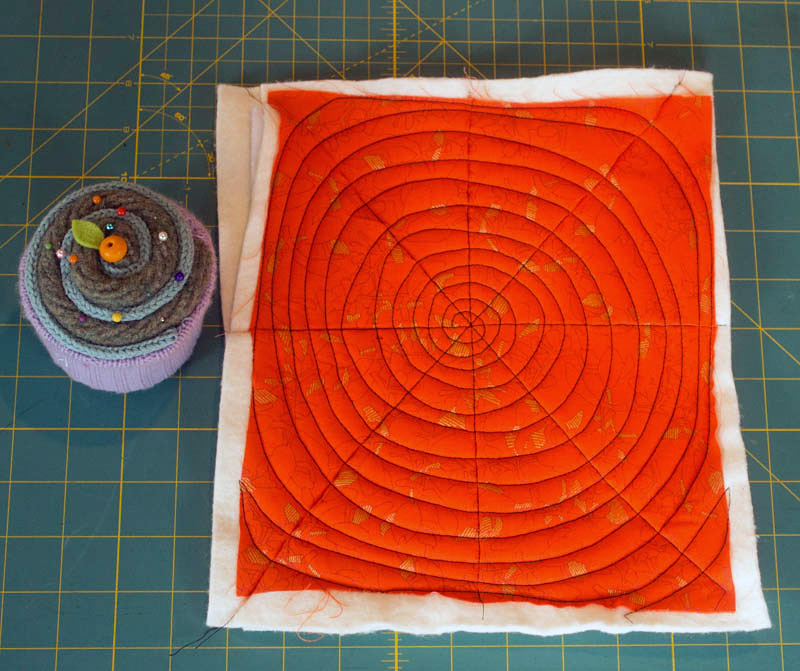
5. Continue stitching in a circular pattern to quilt the entire potholder. Try to keep the fabric layer as smooth as possible, but don’t stress if it “creases” up a bit as you approach one of the initial straight lines of quilting.
6. Adjust your stitch pattern in the corners completely quilt the layers, and at the same time maintain the circular stitching pattern as evenly as possible.
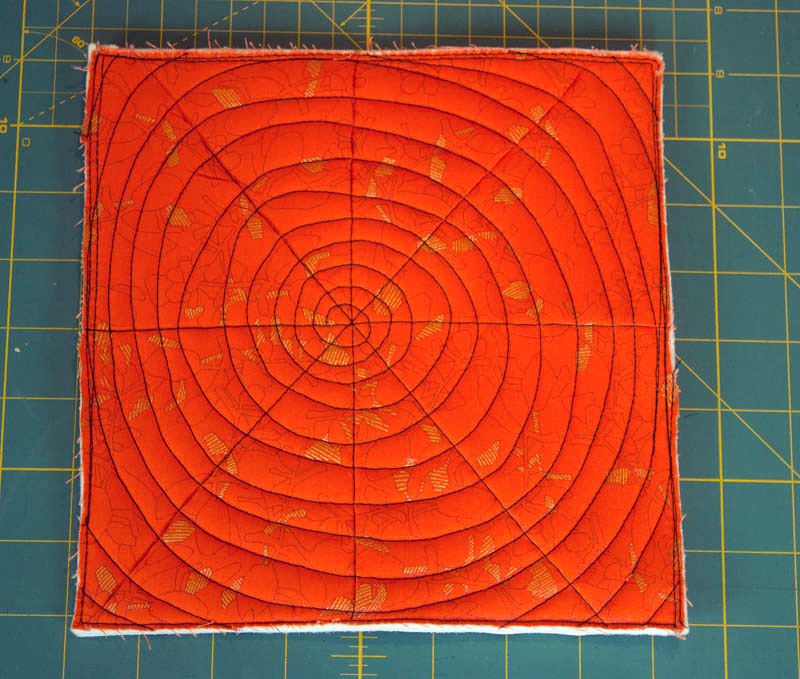
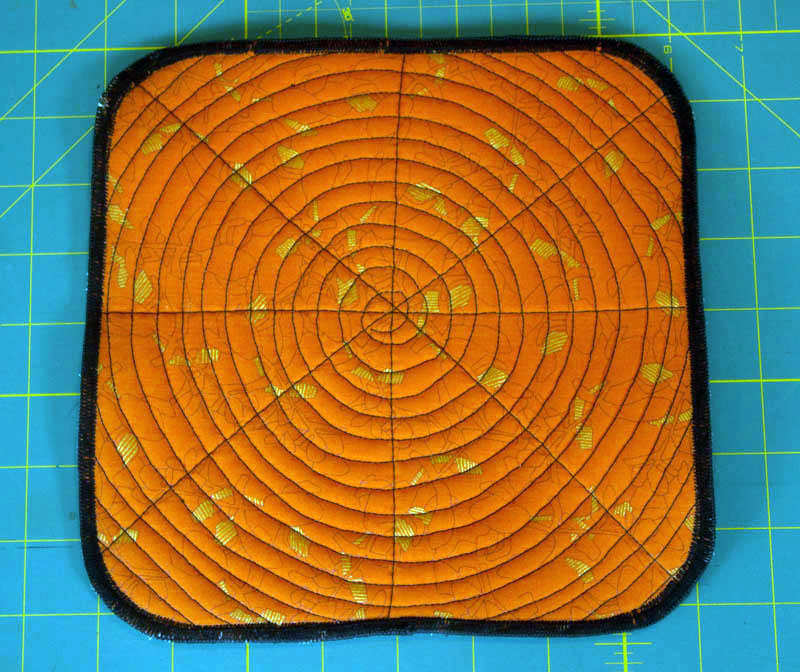
7. Whew! Now that the potholder is completely quilted, trim to the desired size (anything between 8-9 inches is a good sized potholder). It is a good idea to stitch around the perimeter of the potholder, quite close to the edge if you are planning on binding the potholder.
Spider Embroidery:
1. Using a fabric marking pen (I like the Frixion pens), draw a spider shape somewhere on your circular quilted “web”.
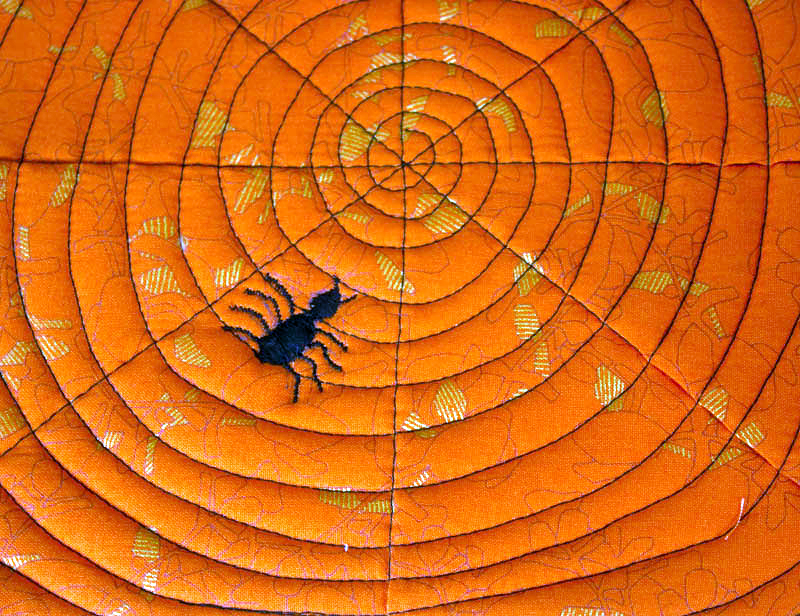
2. Using a satin stitch zig-zag setting, embroider the body and head of the spider. Start and end with a shorter stitch width, and use the longest width setting in the middle of the spider body. Do not worry at all if it is not perfect. Remember, soon enough your potholder will be stained with spaghetti sauce or have a burn mark. Just play and have fun.
3. Using a “lightening” stitch or a very narrow zig-zag, embroider four legs on each side of the spider body. If possible, try to curve the legs a little.
Finishing the Potholder:
1. If you plan on binding your potholder, you will need to cut three to four bias strips of fabric 2″ wide to make a 1″ binding. For complete instructions, check out the How To Make Bias Binding tutorial on my blog.
2. Starting in the middle of one side, start pinning the binding onto the edge of the potholder. Pull the binding slightly as you pin.
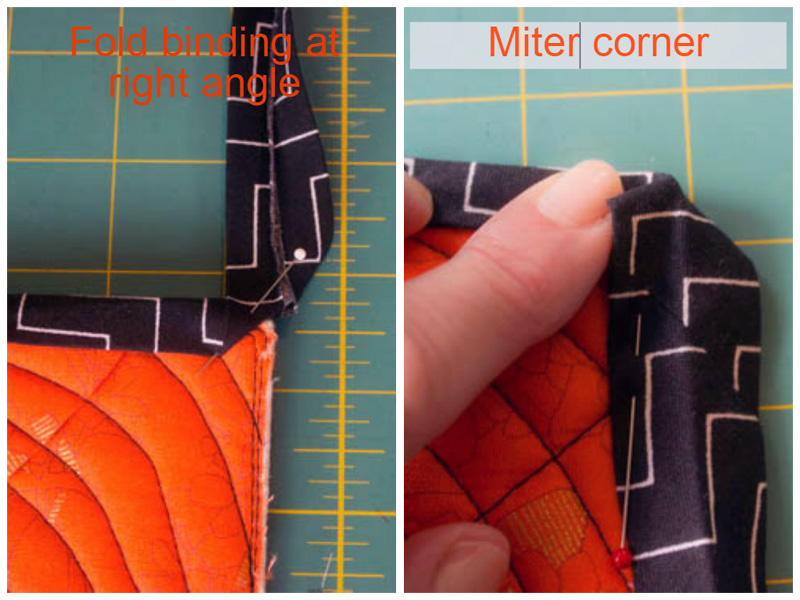
3. Miter each corner as you apply the binding.
4. Starting in the center of any side, stitch close to the edge of the binding. After you have stitched completely around, check the back side of the potholder to make sure the binding edge is secure. If necessary, re-stitch any “holes” to secure the binding.
5. If you prefer to serge around the potholder edge, set your serger for a 3-thread “wrapped” overlock stitch. To accomplish this you will need to loosen your lower looper tension, tighten you upper looper tension, and reduce your stitch length. Practice on the scraps you trimmed from your quilted potholder until you like the look of your stitch.
6. Round the corners of the potholder before you begin serging. Place the potholder under your serger presser foot, and slowly start stitching around the outside edge. If possible, try to avoid cutting away any of the potholder edge; just keep the knife right up against the edge of the potholder. Watch the needle as you go around the curved corner and try to maintain the stitch width on the fabric as evenly as possible. Remember, no stress! The spaghetti sauce stains will cover all!
7. Feel free to repeat the serged stitching around the potholder a second time for better thread coverage (I did a second pass in my example). When you are done serging, overstitch for about ½ inch and chain off a short thread tail. Using a large tapestry needle thread the tail into the stitches and cut off the excess.
8. Done and done!
Your scary spider potholders are complete! Now go make some Halloween cookies and enjoy your using new potholders!