Maybe you cringe when you see new school supplies filling up the aisles. (Summer can’t be over!) Maybe you can’t wait for the school year to begin. (Yippee for new beginnings!) Either way we hope you enjoy the great line up of projects we have for you in the weeks ahead. We think our Back to School fun will help you greet the new year in style; we hope it gives you a little head start to make sure the students in your life make the school year transition with handmade love in the mix! Check out our weekly giveaways below, and keep a look out for more surprises in the days ahead…
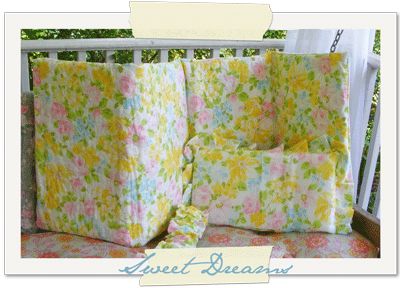
To sleep, per-chance to dream.
While my kids are way past their nap mat days my larger life is full of little people who could use a soft and cozy place to settle down for a rest, whether it’s at preschool or on a nap time visit to grandma’s house. This project uses a typical padded vinyl nap mat as its base, since it is water proof and easy to clean. A cozy quilted cover gives it style and substance enough to make any little person feel your love. I have chosen to make the pictured version from vintage sheets but any quilting cotton or light weight cotton duck fabric would be perfect for this mat cover.
You will need:
- 19×45 inch vinyl nap mat
- Fabric of choice-– if using yard goods you will need 4 yards of fabric-– pre wash your fabric!
- Fusi-Boo (fusible quilt batting)– small pack 60×60 is more than enough
- 1 package bias trim to go with fabric of choice
- ¼ yard of 2 inch thick Nu-Foam if making optional pillow*
- 1 package 1.5 inch thick elastic to make optional security band*
- Walking foot for your machine if you have it
To begin you will cut two pieces of fabric 21×56 and one piece of Fusi-boo 21×56. Layer these together, with the fabrics right side out and the batting on the inside, and fuse together using the instructions on the batting package.
After fusing take the fabric-batting-fabric sandwich to your sewing machine and quilt the surface in any style you wish. I have used an allover meandering pattern but feel free to channel quilt it or do a large cross hatch.
After quilting, square up the entire piece to 20×55; quilting will often distort the fabric and this step gets you back on track.
On one short end of your now quilted panel you will want to finish it with bias tape. You can use commercial tape or feel free to make your own.
Cut another piece of fabric, 20 x 46 (this will be for the back of the mat). Lay the right side of this piece of fabric against the right side of the quilted fabric matching them up at the BOTTOM. The quilted fabric will be longer and will be the end with the bias finish. Pin the layers together working your way up about ½ way and then…
Ready for the tricky bit? Pull the single layer of fabric back for the moment and then fold the quilted piece over on itself so that it now can rest under the single layer of fabric that you have face down. Pull the single layer of fabric back up and pin up the rest of the sides.
Now it is time to sew up the sides of the mat. This is also a great time to use a walking foot if you have it or to serge the sides for a very tidy finish. Sew down one side, across the bottom and then up the other side. DO NOT sew across the top. If you have ever made an envelope-backed pillow cover you get what we have done. By sewing the quilted flap in the mat it will flip over and encase the mat when we turn everything right side out!
After sewing, turn the mat cover right-side out but leave the flap as it is. Slide the mat inside the cover and NOW flip the quilted panel to the back of the mat thereby encasing the mat in its new cover!
*Please note that the rest of the project is optional and you might want to check with your daycare or preschool before taking the time to do the rest; I have been told that pillows are not allowed in most preschool nap rooms and that the ruffled band might be considered a hazard as well. But if you are making this so your little person can take it to the park or over to grandma’s house, have at and gussy your nap mat up all you want!
To make an elastic ruffle, hold your mat together and measure around the mat. Cut your elastic that measurement minus 4 inches. Cut a fabric strip 4 inches wide and two times (2x) as long as the measurement around your nap mat. Create a tube by sewing up the strip of fabric and then turn in right side out and thread the elastic through it. Sew the ends together making sure to firmly catch the elastic in the stitching. Distribute the ruffles around the elastic and hand tack in place if desired.
So how about making a little pillow? By using Nu-Foam as the pillow stuffing it will be easy to wash and quick to dry as opposed to using pillow stuffing.
To make the pillow cut your piece of Nu-Foam to 9 x11 and two panels of fabric 11×13. If you want to add a ruffle cut a strip of fabric 3 inches wide by about 60 inches long.
Take the ruffle strip, fold it in half and iron flat. Then hand pleat it around three sides on the RIGHT side of the pillow panel, holding each pleat in place with a pin. Cover with second panel and then sew together on the three ruffled sides. Insert the Nu-Foam and slip stitch shut the bottom seam.
To hold the pillow in place use small snaps hand sewn to the pillow and to the mat. Make sure that the male-end of the snap is on the pillow and the female end in on the mat so if the mat is used without the pillow it will still be comfortable.