Palak joined us earlier this month with tips for using a serger: Narrow + Rolled Hems with a Serger and Ruffling + Easing with a Serger. Today enjoy her easy First Skirt tutorial. This is a satisfying beginner project and the finished skirts are darling.
An elastic waist skirt is a great first-garment project, whether you are a long time quilter, or someone who just got your first machine. A skirt is also a perfect first project to sew with your kids (with supervision, of course).
This tutorial is written for a beginner and will walk you through sewing a skirt step by step!

Gather Your Supplies
- Fabric: A yard should be plenty. If in doubt, buy double the desired length measured below plus 6 inches.
- Elastic: The tutorial is written for ¾ inch no-roll elastic, but you can use any width you like.
- Ribbon (optional): 2-3 inches of scrap ribbon for an optional ‘tag’
- Safety Pin
- Your Sewing Kit: Pins, scissors (or rotary cutter & mat), tape measure, thread, a hot iron, and your sewing machine
Measure
There are just two measurements that we need for this skirt.
- Waist: Measure all the way around the waist where the skirt will sit.
- Length: Measure from the waist to where you want the skirt to fall (usually above or below the knee).
Cut Your Fabric
The skirt is made of two identical rectangles based on the measurements taken above:
- Width: waist measurement + 1 inch
- Length: skirt length + 1.5 inches
We have to add in the extra fabric to accommodate the in seam allowances, hem and waistband.
Orient your skirt as shown so that the length line runs parallel to the selvedge of your fabric.
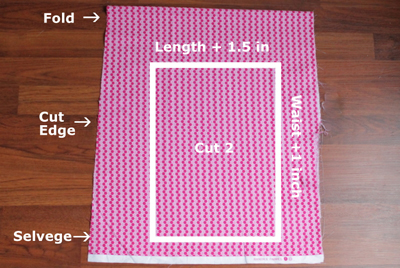
I was able to fold my fabric and cut both rectangles at once. For a larger skirt you may need to unfold your fabric and have the two rectangles side by side. Just remember to keep the length parallel to the selvedge. Save your scraps– You could make matching bows!
Pin and Sew
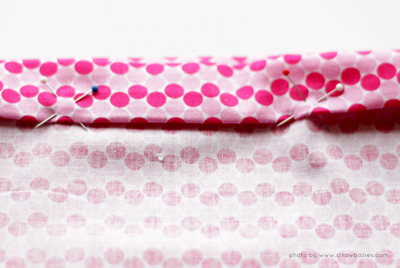
Now for the fun part! Pin your rectangles together (pretty side touching) along the short sides. Pinning perpendicular to the sewing line helps keep everything in place while sewing.
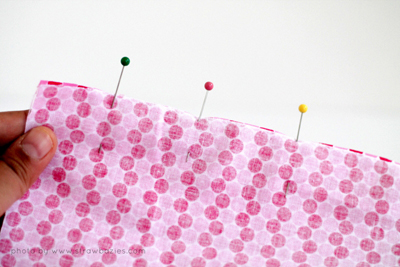
Sew down both side seams with a 1/2 inch seam allowance, pulling the pins out before they hit your machine’s needle. Don’t worry too much about making sure the seam allowance is exact. For this skirt it doesn’t make much difference.

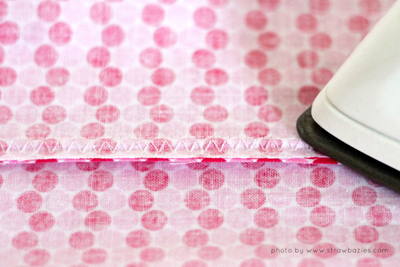
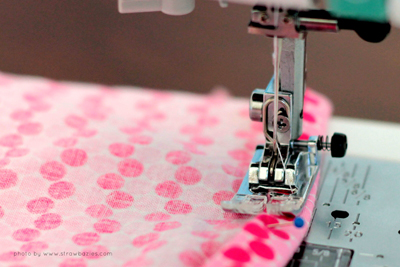
To keep the fabric from fraying, zig zag stitch between the stitching line and the edge of your fabric on both seams.
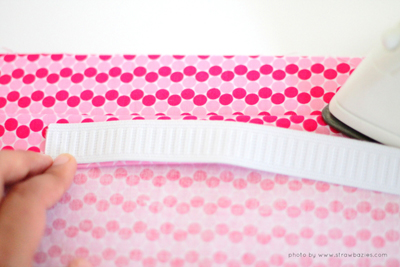
Press. My favorite part about this skirt is that all the ironing can be done in one step.
- Side Seams: Press your side seam allowances to one side.
- Hem: Fold up the bottom of the skirt a quarter of an inch, and then a quarter of an inch again.

Use a few pins to keep the hem in place.

- Waistband: Fold down the top of the skirt a quarter of an inch and press. Then, using the elastic as a guide, fold down ¾ of an inch and press again. Pin everything in place.
As you are pinning around the waist band, leave a couple inches unpinned at the center back. I make a little x with my pins to let me know not to sew through that area.
Sew (Again)
Back at the sewing machine, increase your stitch width to 3.0. I find a longer stitch looks better on the outside of the skirt.
Turn your skirt inside out and sew the hem down as close as you can to the folded edge.
Then, sew the waistband the same way. Be careful not to sew though the center back.
Elastic
Using a safety pin, work the elastic through the ‘tunnel’ we made for the waistband.
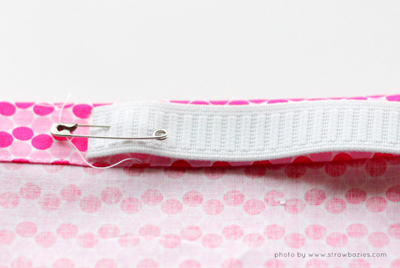
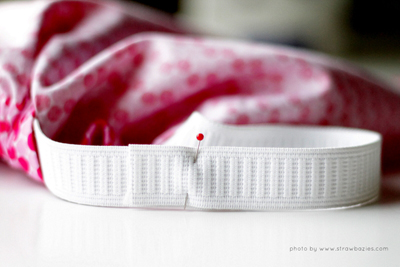
Making sure the elastic is not twisted, overlap both ends about half an inch, and sew down each edge. I ‘scrunch’ as much of the skirt out of the way as possible to make it easy to sew.
Once the elastic is sewn, all we need to do is sew up that hole that we put the elastic through. Smooth out the area with the hole so the fabric is not gathered there.
Fold your ribbon and insert it into the opening. The ribbon is optional, but having a ‘tag’ there will help if anyone else tries to dress your child.
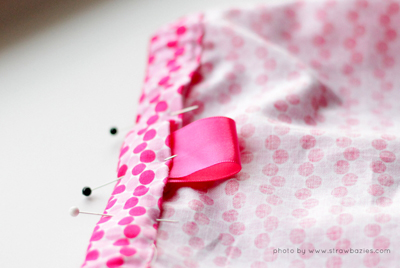
Pin and sew the opening shut.
Twirl!
The best part! This skirt can be worn fresh off the machine.

If this was your first project, you’ve learned so many skills: finishing a seam, pressing, making a casing, and hemming! You’ll need these skills in nearly every garment you sew.
Once you get the basic skirt method down, you can add tons of detail: layers, pockets, trim, applique etc.
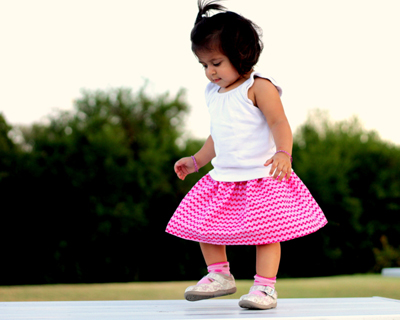
Or… You can just put up your machine, head on over to the park and enjoy watching your daughter play in her first handmade skirt. Happy Sewing!